Extending My VCF Lab Across Multiple Physical Hosts

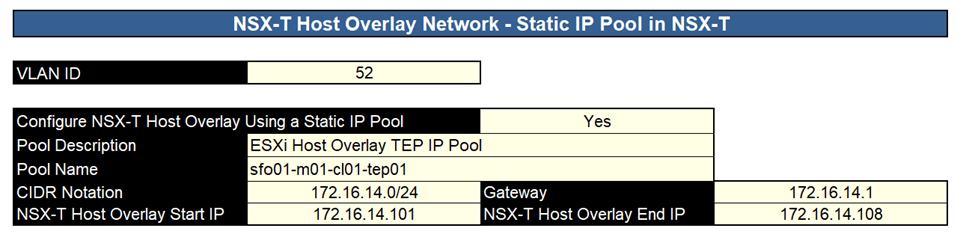
I have been running VMware Cloud Foundation (VCF) in a lab for a few years now. It has always been running on a single physical host. This is fine as long as the host is powerful enough but lately I have been thinking about how to extend it across more than one physical host. I found it obvious that I needed to stretch the VLANs used by VCF between all the physical hosts. I use VLC to deploy VCF and by default it will use VLAN ID 10, 11, 12 and 13. I started with tagging these VLANs on the ports used by my physical hosts. This requires a managed physical switch with support for VLAN trunking. It will also need to support MTU above 1600 bytes to support NSX. I have a QNAP QSW-M408S which supports both.

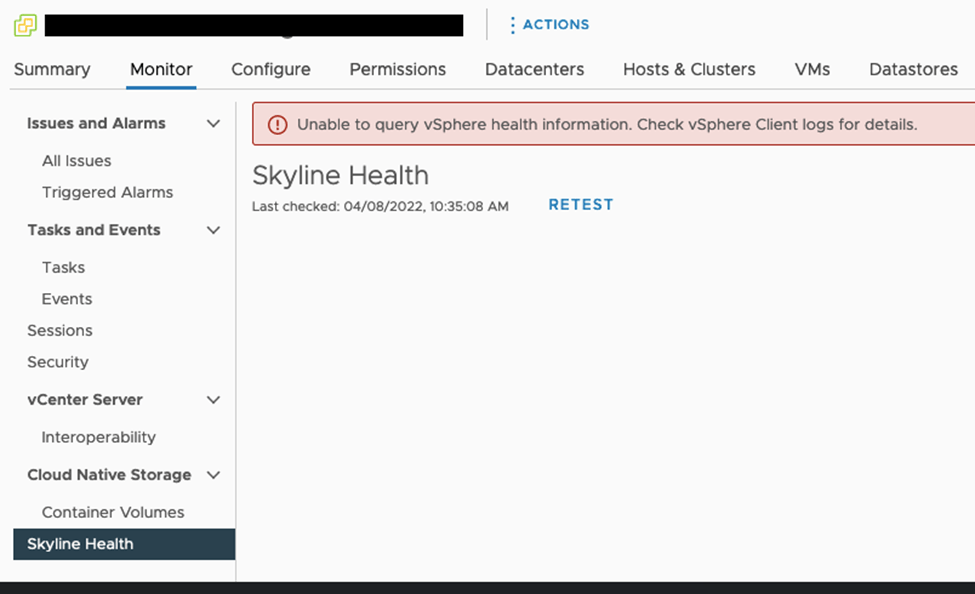
Here is a screen shot from the vCenter in my VCF 5.0 instance showing that it could use more resources, at least to be able to run Aria, Tanzu or other resource intensive apps:

I ran VLCGui and selected Expansion Pack which is the option to use when adding more ESXi hosts to a VCF instance. I configured it to deploy a single ESXi host to the vCenter managing my free physical hosts instead of the one managing my current VCF hosts. After the validation was successful I selected Construct and the nested ESXi host was deployed after a short while.

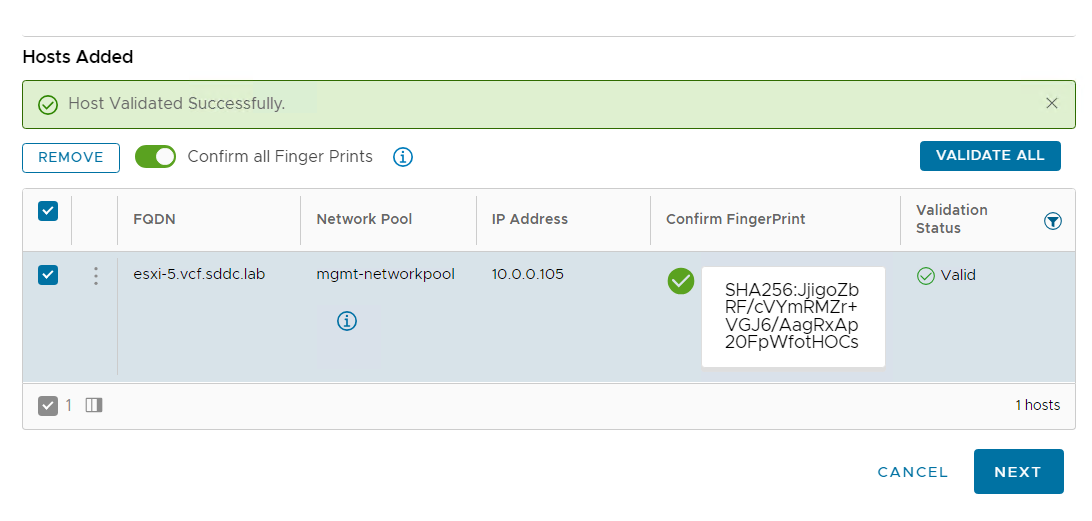
I then went into SDDC Manager and commissioned the new host so that it can be used by VCF:

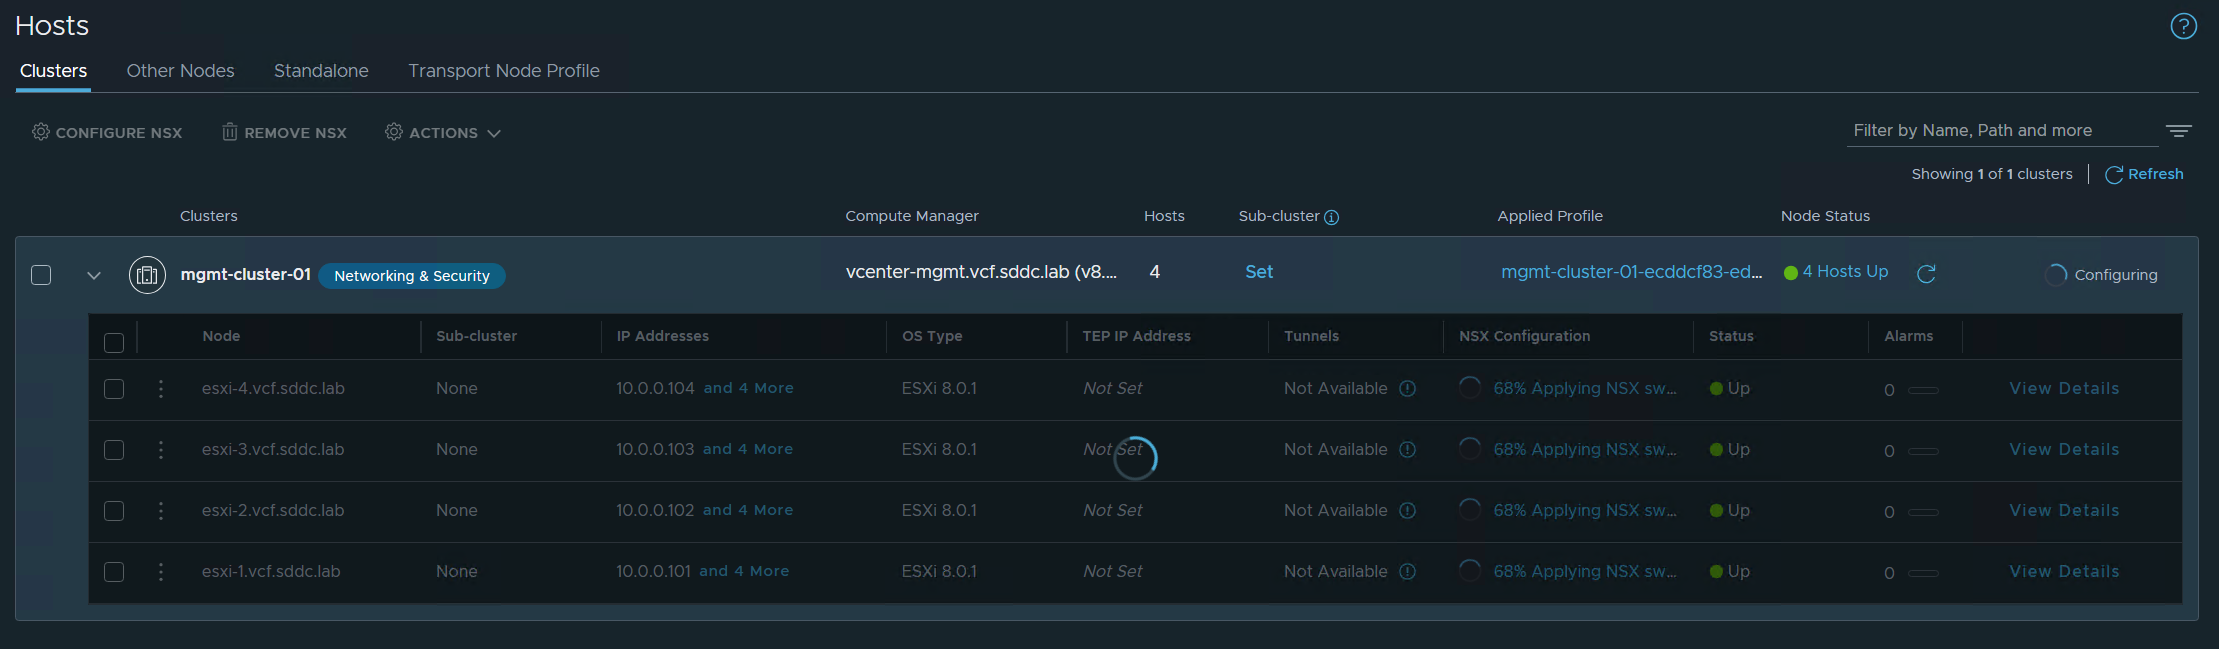
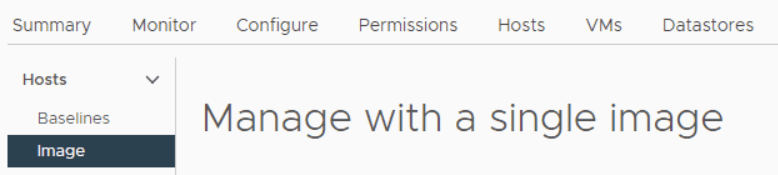
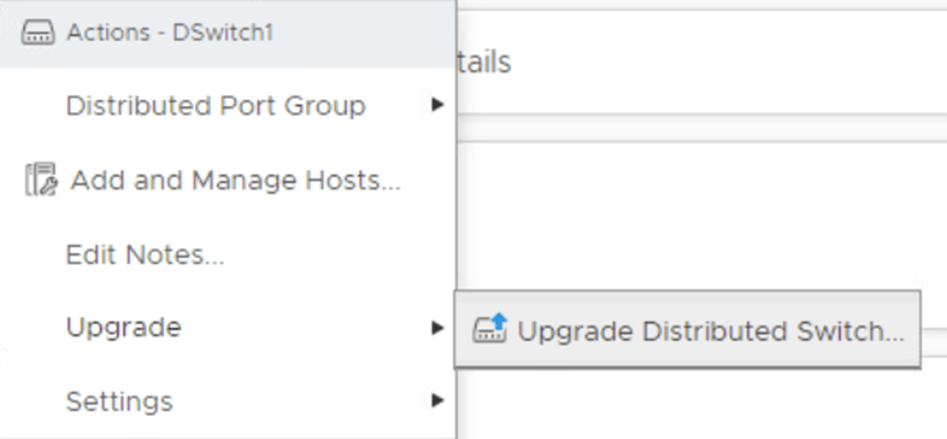
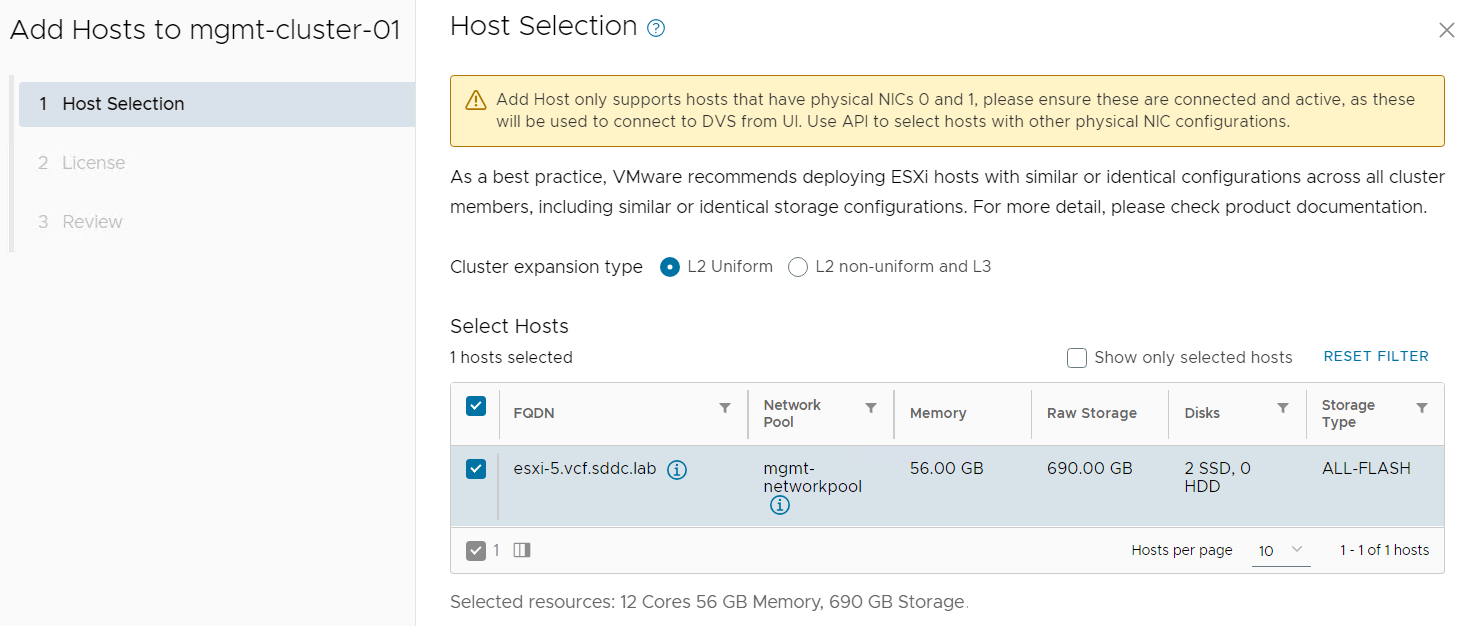
Next step was adding it to my existing cluster:

After the host was successfully added to the cluster I wanted to verify that I could ping with jumbo frames from my new nested ESXi host running on an Intel NUC to a nested ESXi host running on my Dell PowerEdge server:

[root@esxi-5:~] vmkping 172.16.254.14 -S vxlan -s 8800 -d
PING 172.16.254.14 (172.16.254.14): 8800 data bytes
8808 bytes from 172.16.254.14: icmp_seq=0 ttl=64 time=1.288 ms
8808 bytes from 172.16.254.14: icmp_seq=1 ttl=64 time=0.898 ms
8808 bytes from 172.16.254.14: icmp_seq=2 ttl=64 time=0.996 ms

--- 172.16.254.14 ping statistics ---
3 packets transmitted, 3 packets received, 0% packet loss
round-trip min/avg/max = 0.898/1.061/1.288 ms

This step is not really necessary as SDDC Manager should verify this for you.

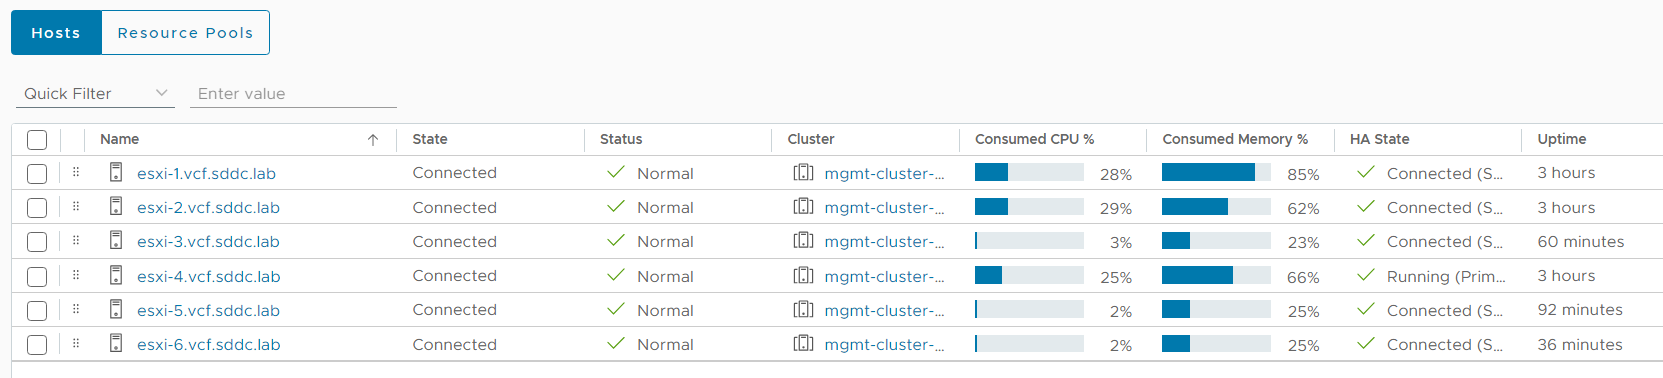
I repeated the steps above to add one more nested ESXi host to my cluster and here is a screen shot from my vCenter with the two additional hosts running:

I found it easy to extend a VCF cluster deployed with VLC across multiple physical hosts as long as I had a physical switch supporting VLAN trunking and jumbo frames. I hope this can help you to add more resources to your VCF lab.

Creating VLAN Backed Segments in VMware Cloud Foundation (VCF)

When deploying VCF the hosts are prepared for NSX using a Transport Node Profile (TNP) where only a single Overlay Transport Zone is attached and no VLAN Transport Zones. This means you are unable to create any VLAN backed segments.

I have been asked by several customers how to use VLAN backed segments with VCF and I couldn’t find any documentation on this, so I asked VMware if there was a supported way and the answer was yes. We can manually add a VLAN Transport Zone to the existing TNP.

When using a Baseline based Workload Domain (WLD) the TNP is detached from the cluster. This would always be the case with the Management WLD. This means that when you have added the VLAN Transport Zone to the TNP, it needs to be attached to the cluster so that the Transport Zone can be added to the hosts. Then you should detach the TNP from the cluster again. If you have an Images based WLD, the TNP should already be attached to the cluster and you should leave it like that. The screenshots below are from my Management WLD which is Baseline based. Note that there is nothing listed under Applied Profile.

I selected the cluster and chose Configure NSX to attach the TNP to the cluster.

NSX started configuring the ESXi hosts so that the VLAN Transport Zone could be added.

Checking the configuration on one of the ESXi hosts shows that the VLAN Transport Zone was added successfully.

I then selected the cluster again and chose Detach Transport Node Profile from the Actions menu so that it is back to the initial state.

When adding a new host to the cluster, SDDC Manager should attach the TNP to the cluster again, prepare the new host with NSX, then detach the TNP again.

Deploying VMware Cloud Foundation (VCF) 5.0 in my Home Lab

I have an 11 years old Dell PowerEdge T420 server in my basement. This server already ran ESXi 7 and 8 without problems (!) but it lacked the performance to do everything I wanted it to do, like running VMware Cloud Foundation (VCF).

I investigated options to upgrade the server, and since it aleady had its maximum amount of memory (384 GB) I started looking into what kind of CPUs it would take. I found that it should work with any Intel Xeon E5-2400 CPU so I searched for Intel Xeon E5-2470V2 3.2GHz Ten Core CPUs since that is the fastest one in that generation. One nice thing about wanting to buy such old hardware is that you can often find it cheap on eBay, and I don’t care if they are used and lack warranty. I quickly found two E5-2470V2 CPUs for a total of only $19.00.

I then looked into what kind of storage my server would take and after some investigation I figured I would get the best performance using an M.2 NVMe SSD to PCIe adapater. Since my server only supports PCIe 3.0 I was also able to get a cheaper adapter and NVMe device compared to the 4.0 versions. I went for the ASUS Hyper m.2 X16 Card which has active cooling and room for four NVMe devices in case I want to expand later. I also got the Samsung 970 EVO Plus 2000GB M.2 2280 PCI Express 3.0 x4 (NVMe) which was on sale, and also happens to be the same NVMe I use for ESXi 8 in other hosts so I know it works well.

Installing the new hardware went without any problems. However I didn’t figure out how to boot from the NVMe device so it still boots from SAS drives. This is not a big issue for me and I can replace the SAS drives with a regular 2.5 inch SSD at any time. The NVMe will be used for hosting virtual machines like nested ESXi hosts.

Soon after checking that everything was working I deployed VCF 5.0 onto the NVMe device using VLC like I always do. It seemed to go well, but the ESXi hosts would not start indicating that the CPUs were incompatible with version 8. Adding the last three switches to the following line in VLCGui.ps1 let me install ESXi 8 successfully:

$kscfg+="install --firstdisk --novmfsondisk --ignoreprereqwarnings --ignoreprereqerrors --forceunsupportedinstall`n"

VCF bring-up only took 1 hour and 50 minutes which I am very happy with.

Deploying NSX Edge Nodes onto this server failed with “No host is compatible with the virtual machine. 1 GB pages are not supported (PDPE1GB).” Adding “featMask.vm.cpuid.PDPE1GB = Val:1” to the Edge Node did not resolve this problem either. I ended up adding all of these advanced settings to the nested ESXi hosts to solve the issue:

featMask.vm.cpuid.PDPE1GB = Val:1
sched.mem.lpage.enable1GPage = "TRUE"
monitor_control.enable_fullcpuid = "TRUE"

Unfortunately I have not yet had the time to figure out if all of these three settings were required, or only one or two of them, but I am very happy that I can run NSX Edge Nodes.

VCF 5.0 runs fine on my old server and the performance is great. I think getting an old server and do a few upgrades can be the cheapest and best way to get a high performing environment in a home lab compared to Intel NUCs or building a custom server with only new components. But there are some caveats like the CPUs could be unsupported for what you need to run. Other hardware like storage controllers and NICs may also not be supported by the OS or hypervisor you wish to install. Noise can also be a problem if you need to keep it running in your office.

Upgrading my Lab to vSphere 8

I have a small two node vSAN cluster running at home on a couple of Intel NUCs. This cluster has been running vSphere 7 since it was born, but now I figured it was time to upgrade it to vSphere 8. I started with upgrading the vCenter Server by mounting the iso on my laptop, running the installer and selecting the Upgrade option.

The process is quite straight forward but I will post the screenshots here in case anyone wants to see the steps required.

The vCenter upgrade completed successfully without any problems so I moved on to upgrading the ESXi hosts. Since vSphere Lifecycle Manager using Baselines is deprecated I wanted to change to using it with Images, meaning using a single image to manage all hosts in the cluster. A cluster in Baselines mode can be converted into a cluster in Images mode, so that is what I did.

The first try gave me the error below, but upgrading NSX to Version 4.0.1.1.0.20598726 solved this problem.

The second try gave me the following error, and this was solved by enabling trust for the Compute Manager in NSX Manager.

The third try successfully converted my cluster into Images mode.

You can see from the image below that NSX will be included in the upgraded image. Vmware-vmkusb-nic-fling will not be included but that will be installed manually after the upgrade, however I will try to figure out how to add this to the image at a later time since I use the USB Network Native Driver for ESXi fling and it would be nice not having to install it manually each time I upgrade.

I have also selected to only remediate the host named nkk-esxi-01 first and not the entire cluster. This way I can validate that the image works for my hosts before upgrading all of them. It is a common misunderstanding that this is not possible when managing the cluster with a single image.

My first host was upgraded to ESXi 8.0b whitout any issues, so I went on and upgraded my second host as well as the vSAN witness host.

Since upgrading my lab to vSphere 8, several new updates came out, the latest being Update 1a for both vCenter and ESXi. I started with upgrading my vCenter to the latest version before moving on to planning the ESXi upgrade.

As mentioned before, I use the USB Network Native Driver for ESXi fling so I also wanted to figure out how to include this in my image prior to upgrading my ESXi hosts. This was done by going to Updates – Actions – Import Updates in Lifecycle Manager.

The driver can then be added to the image by selecting ADD COMPONENTS when editing the image.

The image was now ready and I chose to remediate my first host.

After the first host was remediated successfully, I did the same with the rest of the hosts in the cluster including the vSAN Witness host.

Issues When Creating Custom ESXi ISO Image Using vSphere Lifecycle Manager

I use vSphere Lifecycle Manager to create custom ESXi iso images when upgrading or installing ESXi for customers but the process has some issues that I will address in this post.

The first issue is that you are unable to export the file because the port number in the URL is wrong and you get an “ERR_SSL_PROTOCOL_ERROR” message in the browser.

This is resolved by removing :9084 from the URL in your browser.

Issue number two is that you are unable to download the ISO image if you have certain Vendor Addons included in the image. You are stuck with a task trying to download a 2 B file which never finishes.

The temp file at 1 KB does not grow at all.

This issue can be worked around by downloading the Vendor Addon from https://customerconnect.vmware.com/downloads and then uploading the file to vSphere LCM.

Select to upload the zip file you downloaded from https://customerconnect.vmware.com/downloads and wait for the Import updates task to finish.

Go back to your cluster and export the image again and it should now succeed.

I hope this post will help you get past two very annoying problems when trying to export custom ISO images using vSphere LCM.

ESXi Temporary Directory Exist Error on VCF Upgrade Precheck

I helped a customer upgrading from VCF 4.3 to 4.4 and encountered the following error message during the Upgrade Precheck:

“ESXi Temporary Directory Exist”

Expanding the error message gave me the following error description with several remediation suggestions:

“Directory /locker on host does not support the upgrade for resource, Please check”

None of the suggestions worked, so I started investigating log files and found that the ESXi hosts had an inaccessible Datastore which the customer’s backup solution had left behind after a failed backup job. Unmounting the Datastore from the hosts resolved the issue.

Convert vSphere Lifecycle Manager Mode in VCF

I recently had a customer who was unable to upgrade the Management Workload Domain in their VCF 4.3 deployment. After digging around for a while I found that the cluster was configured with vSphere Lifecycle Manager Images which is not compatible with the following features which they were using:

               – Stretched Cluster

               – Management Workload Domain

The Management Workload Domain must use vSphere Lifecycle Manager Baselines. That is also the case in with any clusters that are stretched.

I couldn’t find any procedure to change from vSphere Lifecycle Manager Images to vSphere Lifecycle Manager Baselines, and the customer had production workloads running in this cluster, so a redeploy was not a good option. VMware Support gave me the following procedure which did the trick:

The “lifecycleManaged” property needs to be changed to “false”. The lifecylceManaged property manipulations are provided via VMODL1 APIs:

               1. Access the internal API through mob access using the URL: https://<vc_ip>/mob/&vmodl=

               2. Navigate to the “content” property

               3. Navigate to the “rootFolder” property

               4. Navigate to the datacenter where the cluster is, using the datacenter list provided in the “childEntity” property

               5. Navigate to the “hostFolder” property. This should list all the hosts and clusters within that datacenter you chose in Step 4

               6. Navigate to the cluster that you wish to reset property on and check whether the URL still contains “&vmodl=1” at the end. The internal APIs get listed only when “&vmodl=1” is appended to the URL. At this stage verify if lifecycleManaged property is set to true at the onset

               7. You should see the below two methods. Invoke the disableLifecycleManagement method and refresh to see if lifecyleManaged is set to false

void

disableLifecycleManagement

vim.LifecycleOperationResult

enableLifecycleManagement

               8. If the cluster is vSphere HA enabled, please restart updatemgr and vpxd using below commands on the vCenter appliance:

vmon-cli -r updatemgr

vmon-cli -r vpxd

I strongly recommend doing the above fix together with VMware Support if you are working on a production environment.

DHCP is crucial for VMware Cloud Foundation (VCF)

When deploying VMware Cloud Foundation (VCF) one can choose between configuring NSX-T Host Overlay using a static IP Pool or DHCP. This is specified in the vcf-ems-deployment-parameter spreadsheet which is used by the Cloud Builder appliance to bring up the Management Workload Domain as you can see in the following images:

If No is chosen, it is crucial that you provide a highly available DHCP server in your NSX-T Host Overlay VLAN to provide IP addresses for the TEPs. In the past I have had several customers who have either broken their DHCP server or their DHCP Relay/DHCP Helper so that the TEPs were unable to renew their IP configuration. This will make NSX-T configure APIPA (Automatic Private IP Addressing) addresses on these interfaces. The IP address range for APIPA is 169.254.0.1-169.254.255.254, with the subnet mask of 255.255.0.0.

The following image shows this issue in the NSX-T GUI:

You can also see this in the vSphere Client by checking the IP configuration on vmk10 and vmk11.

The impact is that the Geneve tunnels will be down and nothing on Overlay Segments will be able to communicate. This is critical, so keep you DHCP servers up or migrate to using a Static IP Pool.

To renew the DHCP lease on vmk10 and vmk11 you can run the following commands from ESXi Shell:


esxcli network ip interface set -e false -i vmk10 ; esxcli network ip interface set -e true -i vmk10


esxcli network ip interface set -e false -i vmk11 ; esxcli network ip interface set -e true -i vmk11

Most customers choose to configure NSX-T Host Overlay using DHCP because that used to be the only option. Using a static IP Pool is also still not compatible with some deployment topologies of VMware Cloud Foundation, such as multiple availability zones (stretched clusters) or clusters which span Layer 3 domains.

It is possible to migrate to Static IP pool from DHCP following this KB:

Day N migration of NSX-T TEPS to Static IP pool from DHCP on VCF 4.2 and above (84194)

Migrate to DHCP from Static post deployment is not possible.

vCenter 7.0 requires LACP v2

When upgrading to vCenter 7.0 one of the prerequisites to check is the versions of the existing vSphere Distributed Switches (VDS) in the environment. They need to be at version 6.0 or higher. Recently I was helping a customer upgrading to vCenter 7.0 and all their VDS’es were at version 6.6.0, and all other prerequisites where met as well, so we went ahead with the upgrade.

vCenter Upgrade Stage 1 completed successfully but early in vCenter Upgrade Stage 2 we got the following error message:

“Source vCenter Server has instance(s) of Distributed Virtual Switch at unsupported lacpApiVersion.”

I found this strange since the customer was running vCenter 6.7, and basic LACP (LACPv1) is only supported on vSphere versions 6.5 or below. Somehow this customer had upgraded to vCenter 6.7 and VDS 6.6.0 without upgrading to LACP v2. When you upgrade a vSphere Distributed Switch from version 5.1 to version 6.5, the LACP support is enhanced automatically. If basic LACP support was enabled on the distributed switch before the upgrade, the LACP support should be enhanced manually. The customer was not longer using LACP, but they had used it in the past.

The following KB provides the prerequisites and steps to convert to the Enhanced Link Aggregation Control Protocol (LACP v2) support mode on a vSphere Distributed Switch in vSphere:

Converting to Enhanced LACP Support on a vSphere Distributed Switch- “Source vCenter Server has instance(s) of Distributed Virtual Switch at unsupported lacpApiVersion” (2051311)

Unable to query vSphere health information. Check vSphere Client logs for details.

I have been helping quite a few customers with upgrading to vSphere 7.0 lately. In this post I will share an issue we encountered when upgrading from vCenter 6.7 to 7.0 and how we resolved it.

Prior to starting the upgrade I always do a thorough health check of the existing environment. The following error message quickly got my attention when trying to run Skyline Health:

“Unable to query vSphere health information. Check vSphere Client logs for details.”

Rebooting the vCenter Appliance didn’t resolve this, and we always try to turn it off and on again first, right? I started looking into the logs and searching the web for others who have had the same error message and found a few cases where this issue was resolved by starting the VMware Analytics Service but this was already running fine.

After digging further through the logs I found that the following KB may be exactly what we needed:

vCenter Server certificate validation error for external solutions in environments with Embedded Platform Services Controller (2121689)

The resolution in the KB solved this problem and we could move on with the upgrade.