When deploying VCF the hosts are prepared for NSX using a Transport Node Profile (TNP) where only a single Overlay Transport Zone is attached and no VLAN Transport Zones. This means you are unable to create any VLAN backed segments.
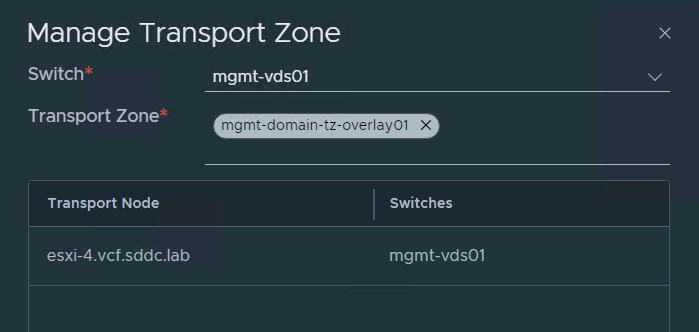
I have been asked by several customers how to use VLAN backed segments with VCF and I couldn’t find any documentation on this, so I asked VMware if there was a supported way and the answer was yes. We can manually add a VLAN Transport Zone to the existing TNP.
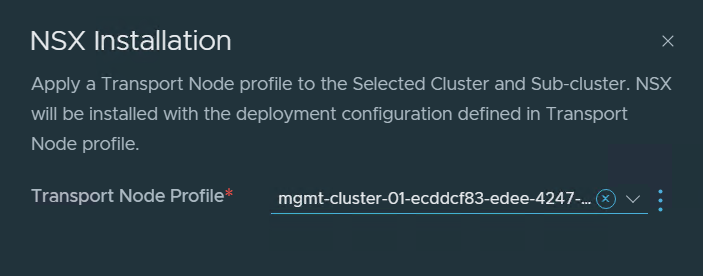
When using a Baseline based Workload Domain (WLD) the TNP is detached from the cluster. This would always be the case with the Management WLD. This means that when you have added the VLAN Transport Zone to the TNP, it needs to be attached to the cluster so that the Transport Zone can be added to the hosts. Then you should detach the TNP from the cluster again. If you have an Images based WLD, the TNP should already be attached to the cluster and you should leave it like that. The screenshots below are from my Management WLD which is Baseline based. Note that there is nothing listed under Applied Profile.

I selected the cluster and chose Configure NSX to attach the TNP to the cluster.
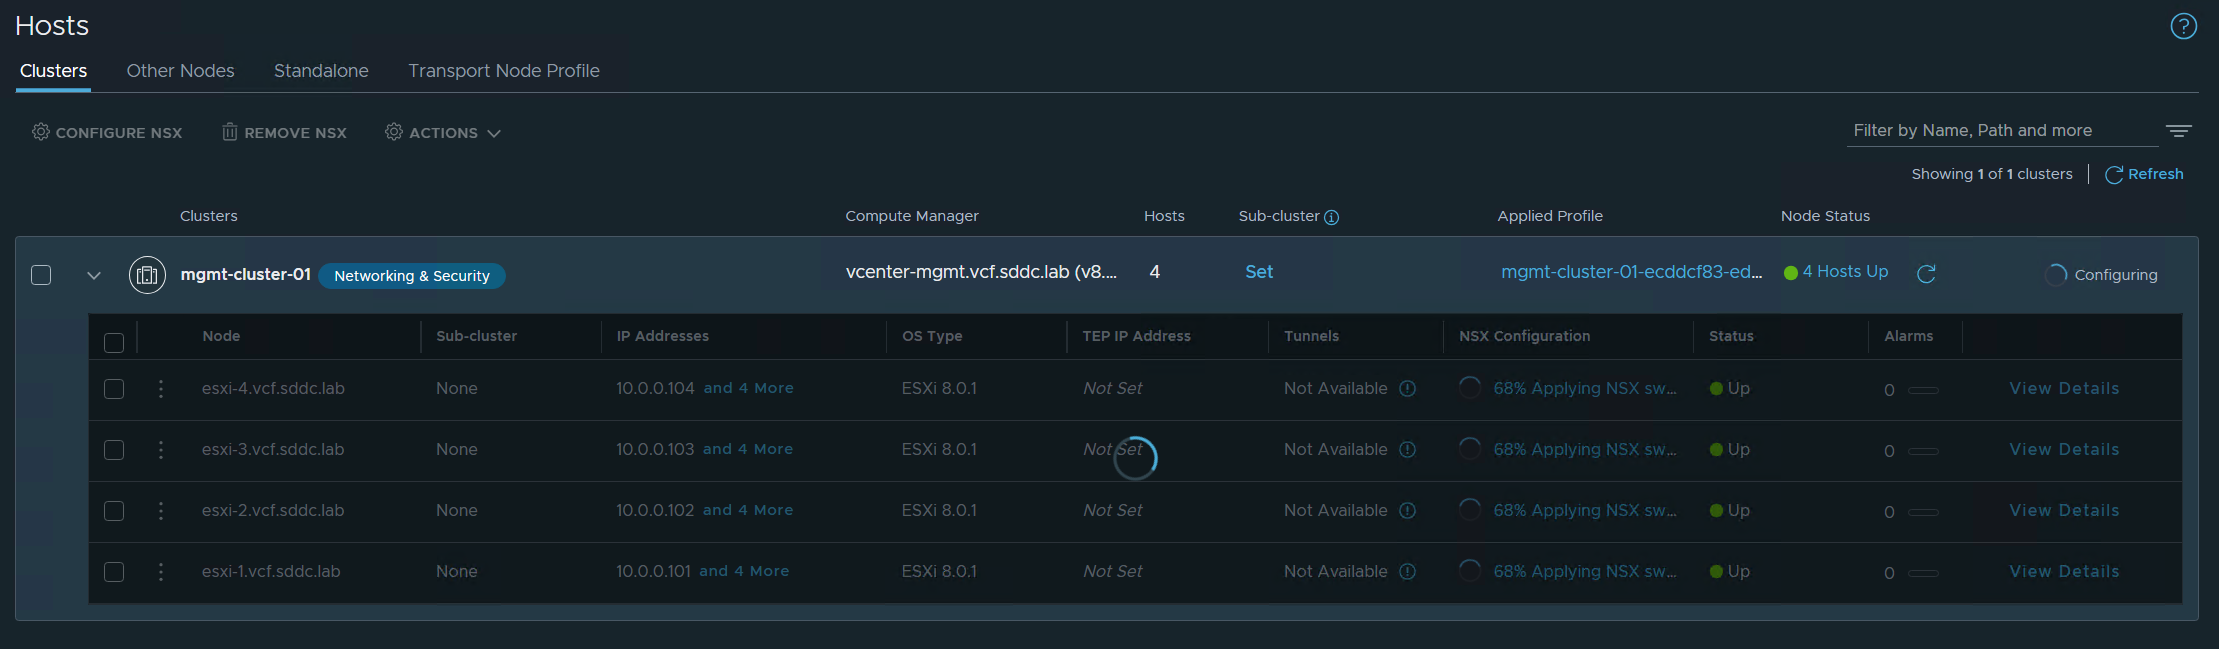
NSX started configuring the ESXi hosts so that the VLAN Transport Zone could be added.
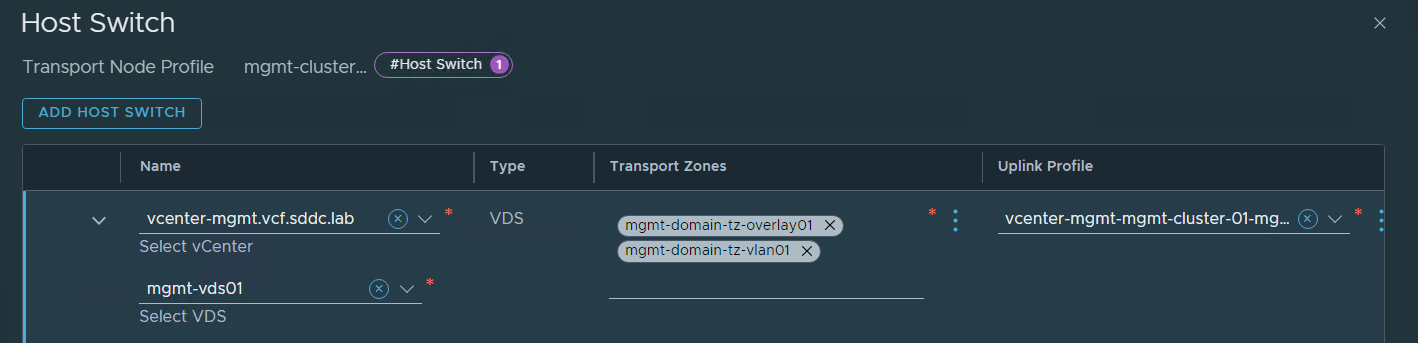
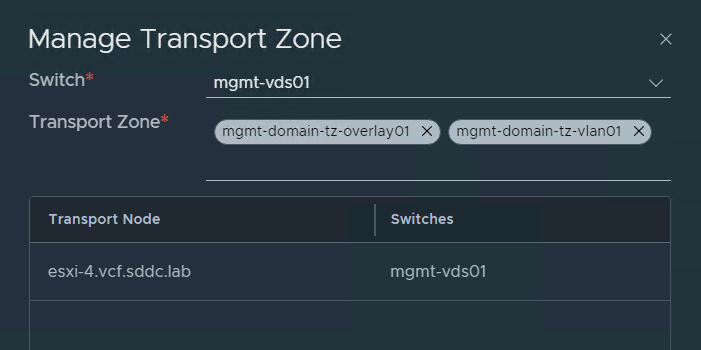
Checking the configuration on one of the ESXi hosts shows that the VLAN Transport Zone was added successfully.
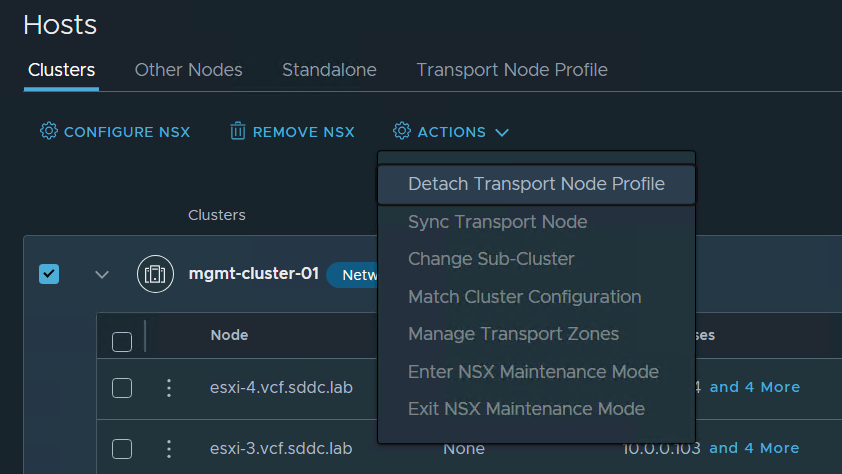
I then selected the cluster again and chose Detach Transport Node Profile from the Actions menu so that it is back to the initial state.
When adding a new host to the cluster, SDDC Manager should attach the TNP to the cluster again, prepare the new host with NSX, then detach the TNP again.