VCF 4.2 introduced support for NSX-T Federation which provides the ability to manage, control and synchronize multiple NSX-T deployments across different VCF instances which could be in a single region or deployed across regions. You can stretch Tier-0 and Tier-1 Gateways, Segments, and Groups used for Firewalling. Requirements between sites are maximum round-trip time of 150 ms, and 1500 bytes MTU is supported, however not recommended for best performance. NSX Managers and Edge Nodes need connectivity between them, but ESXi hosts don’t require connectivity across sites. Configuration is done on a new NSX Manager role called Global Manager and pushed out to the local NSX Managers in each site, but you can still also connect directly to the Local Managers in case you have a requirement not supported by the Global Manager.
This is not a detailed review of NSX-T Federation, but I will focus on showing you how I got NSX-T Federation working between two VFC instances in my lab. Sorry for the lack of a proper naming convention, but hopefully you are able to follow along.
Configuration Overview
| Hostname | Role | VCF Instance | Location | Region |
| vcenter-mgmt.vcf.sddc.lab | vCenter Server | 1 | BGO | A |
| sddc-manager.vcf.sddc.lab | SDDC Manager | 1 | BGO | A |
| nsx-mgmt-1.vcf.sddc.lab | NSX-T Local Manager | 1 | BGO | A |
| nsx-global-mgmt.vcf.sddc.lab | NSX-T Global Manager | 1 | BGO | A |
| vcenter-mgmt.vcf.nils.lab | vCenter Server | 2 | OSL | B |
| sddc-manager.vcf.nils.lab | SDDC Manager | 2 | OSL | B |
| nsx-mgmt-1.vcf.nils.lab | NSX-T Local Manager | 2 | OSL | B |
| nsx-global-mgmt.vcf.nils.lab | NSX-T Global Manager | 2 | OSL | B |
Steps Performed
Note that all images are clickable to make them bigger.
1. Deployed an NSX-T Global Manager appliance in VCF instance 1 (BGO). This is simply done by deploying the nsx-unified-appliance ova and selecting “NSX Global Manager” as Rolename. In a production environment I would also replace the certificate and deploy two additional appliances to create an NSX-T Global Manager Cluster. In my lab I was happy with deploying a single appliance.
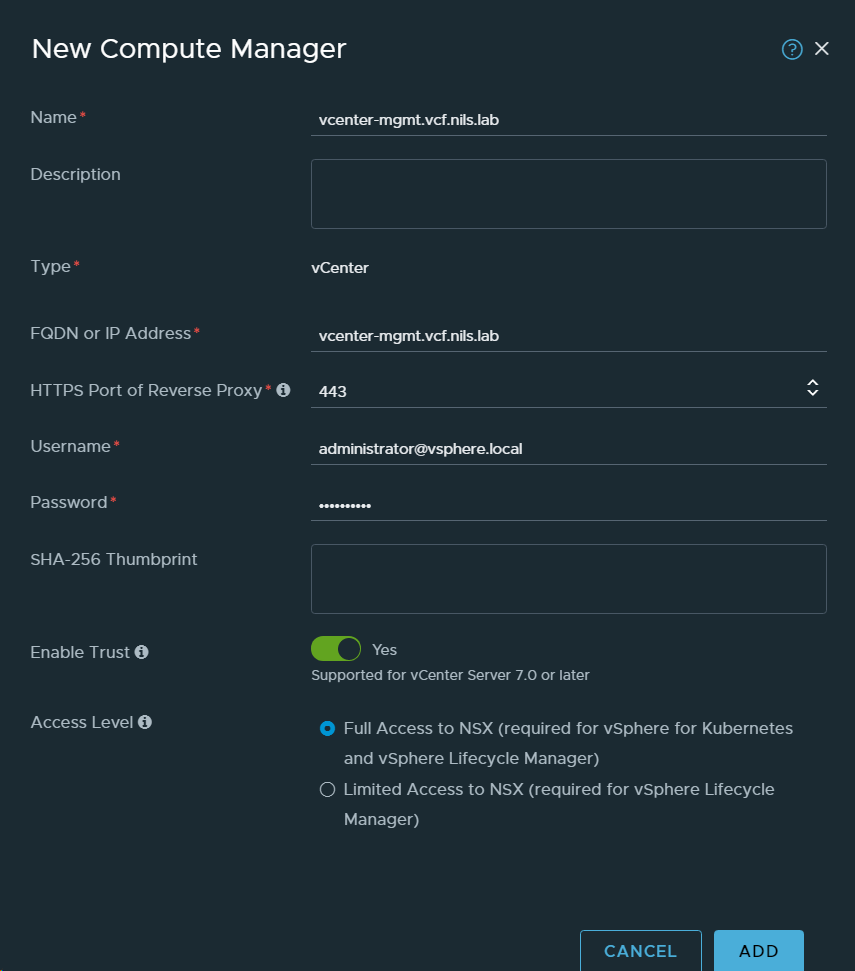
2. Added vCenter Server in VCF instance 1 (BGO) as a Compute Manager.

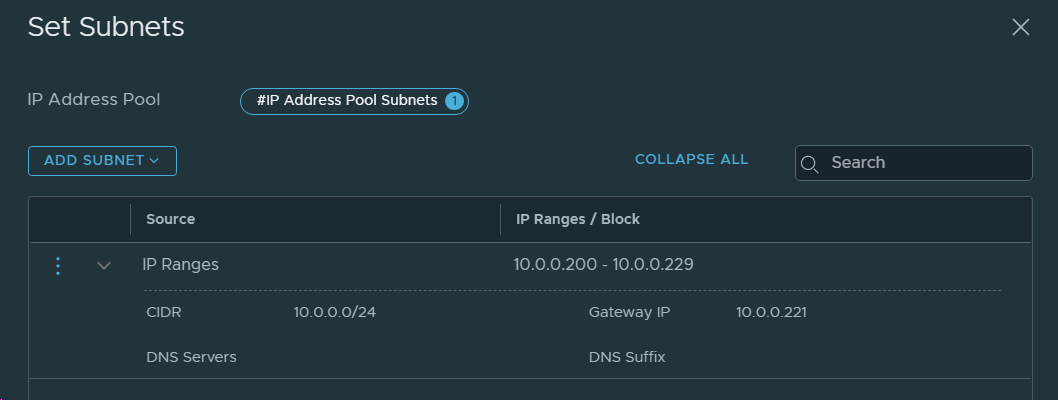
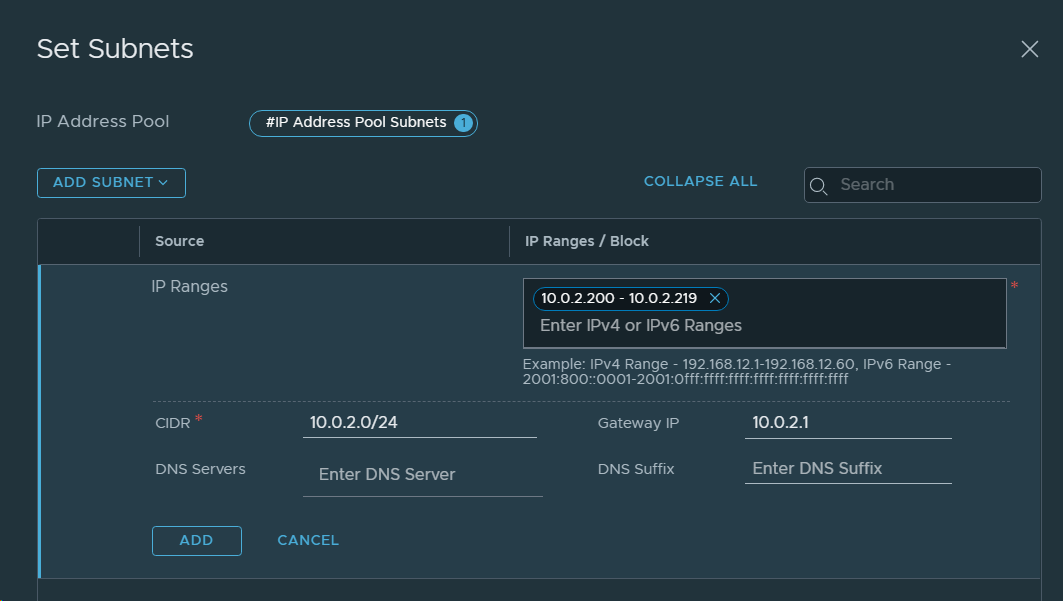
3. Created an IP Pool for Remote Tunnel Endpoints in the Local NSX-T Manager in VCF instance 1 (BGO).
4. Set the NSX-T Global Manager to Active.


5. Obtained the Certificate Thumbprint for the existing NSX-T Manager in VCF Instance 1 (BGO). This can be done by SSH to vCenter and run the following command:
echo -n | openssl s_client -connect nsx-mgmt-1.vcf.sddc.lab:443 2>/dev/null | openssl x509 -noout -fingerprint -sha256

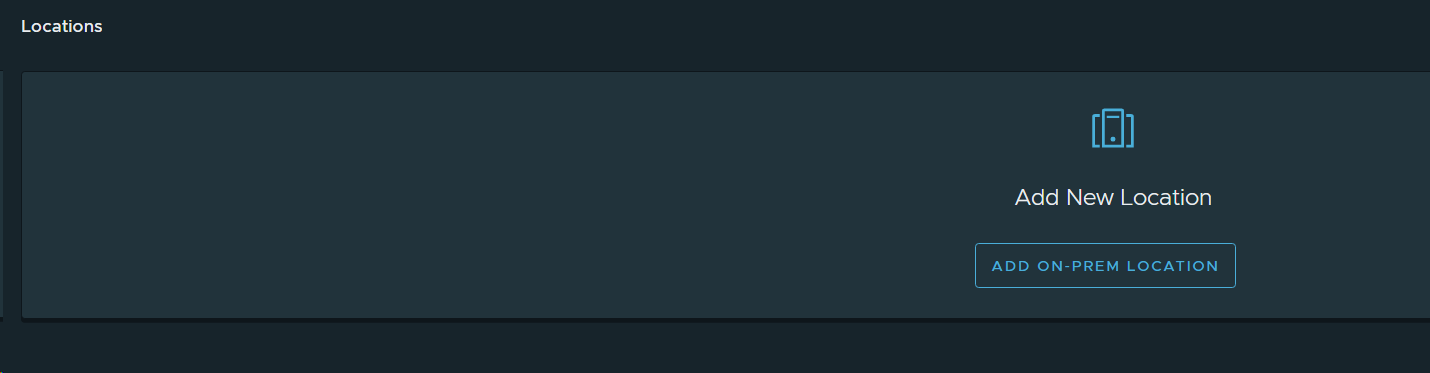
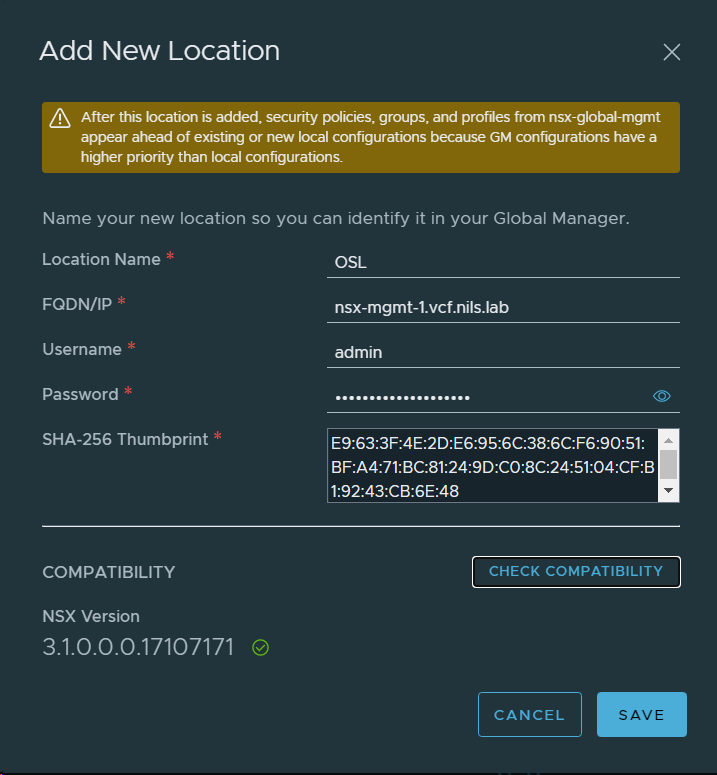
6. Enabled NSX-T Federation by adding the existing NSX-T Manager in VCF Instance 1 (BGO) as a location to the NSX-T Global Manager. Then it became a Local NSX-T Manager.


First attempt gave me this error message:


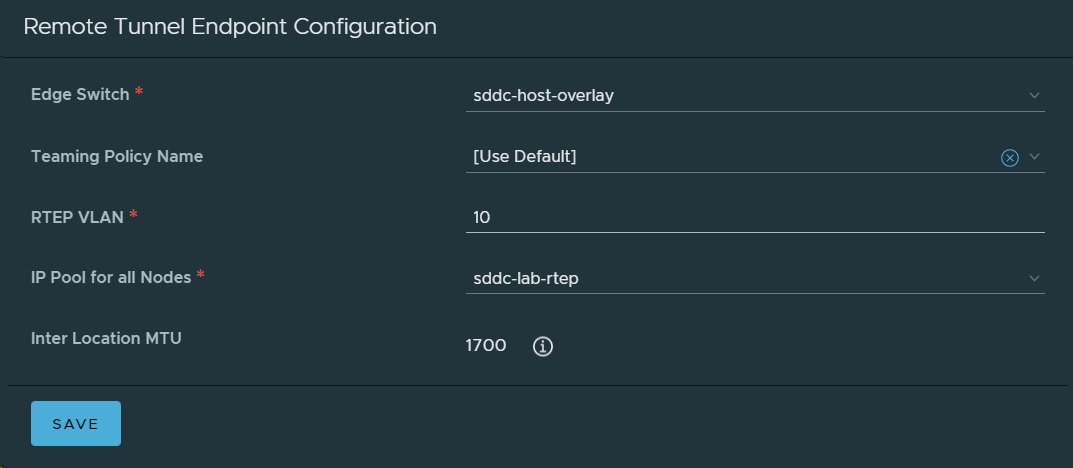
7. Configured networking for the NSX-T Local Manager node in VCF Instance 1 (BGO).
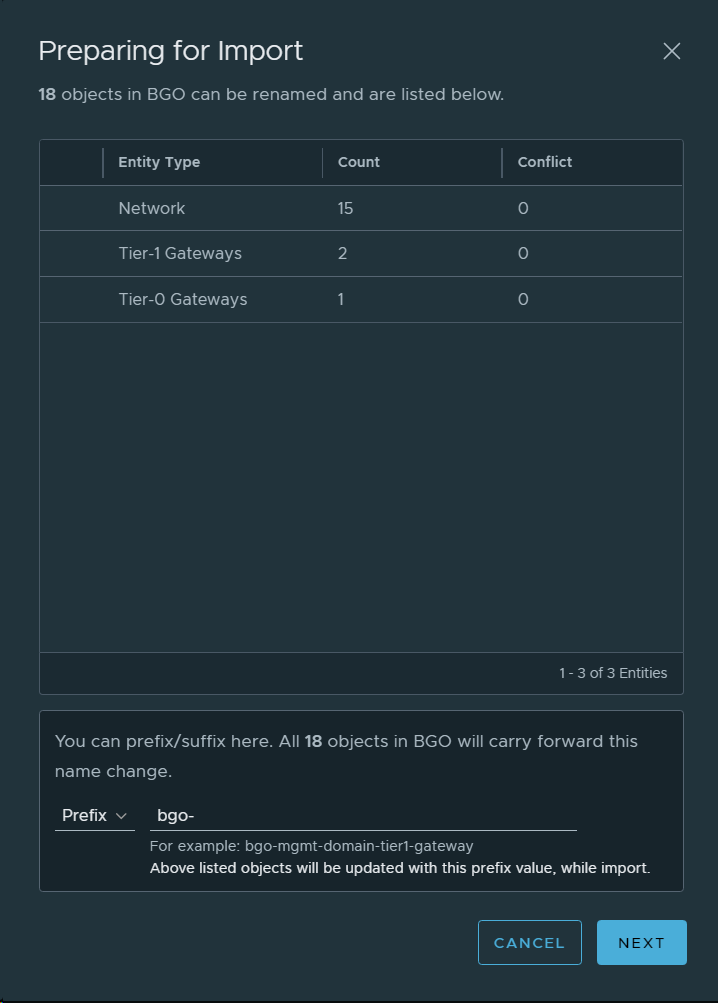
8. Imported the NSX-T Local Manager configurations for VCF Instance 1 (BGO) to the NSX-T Global Manager.


9. Created a Tier-1 Gateway to be stretched between both VCF instances.
10. Connected the existing Cross-Region Segment to the stretched Tier-1 Gateway.

11. Deployed an NSX-T Global Manager appliance in VCF instance 2 (OSL). This is simply done by deploying the nsx-unified-appliance ova and selecting “NSX Global Manager” as Rolename. In a production environment I would also replace the certificate and deploy two additional appliances to create an NSX-T Global Manager Cluster. In my lab I was happy with deploying a single appliance.
12. Connected the new NSX-T Global Manager Node to the vCenter Server in VCF instance 2 (OSL).
13. Created an IP Pool for Remote Tunnel Endpoints in NSX-T Data Center in VCF Instance 2 (OSL).
14. Obtained the Certificate Thumbprint for the existing NSX-T Manager in VCF Instance 2. This can be done by SSH to vCenter and run the following command:
echo -n | openssl s_client -connect nsx-mgmt-1.vcf.nils.lab:443 2>/dev/null | openssl x509 -noout -fingerprint -sha256

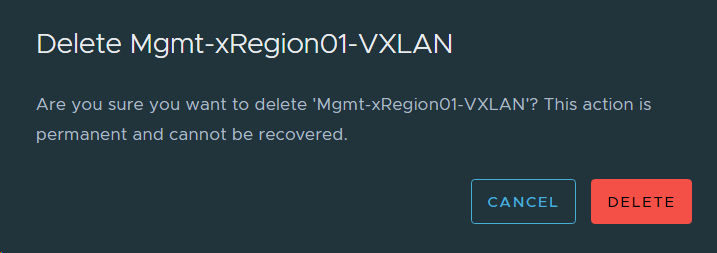
15. Deleted the existing Cross-Region Segment from the NSX-T Manager in VCF Instance 2 (OSL) since we will stretch the one deployed in VCF Instance 1 (BGO). The name in the image below contains “VXLAN”, but this name has stuck in the lab since VCF 3.x where NSX-V was used. It is in fact a regular NSX-T Overlay Segment.
16. Enabled NSX-T Federation by adding the existing NSX-T Manager in VCF Instance 2 (OSL) as a location to the NSX-T Global Manager. Then it became a Local NSX-T Manager. Note that this is done in the NSX-T Global Manager in VCF Instance 1 (BGO), which is the Active one.

17. Configured networking for the NSX-T Local Manager node in VCF Instance 2 (OSL).

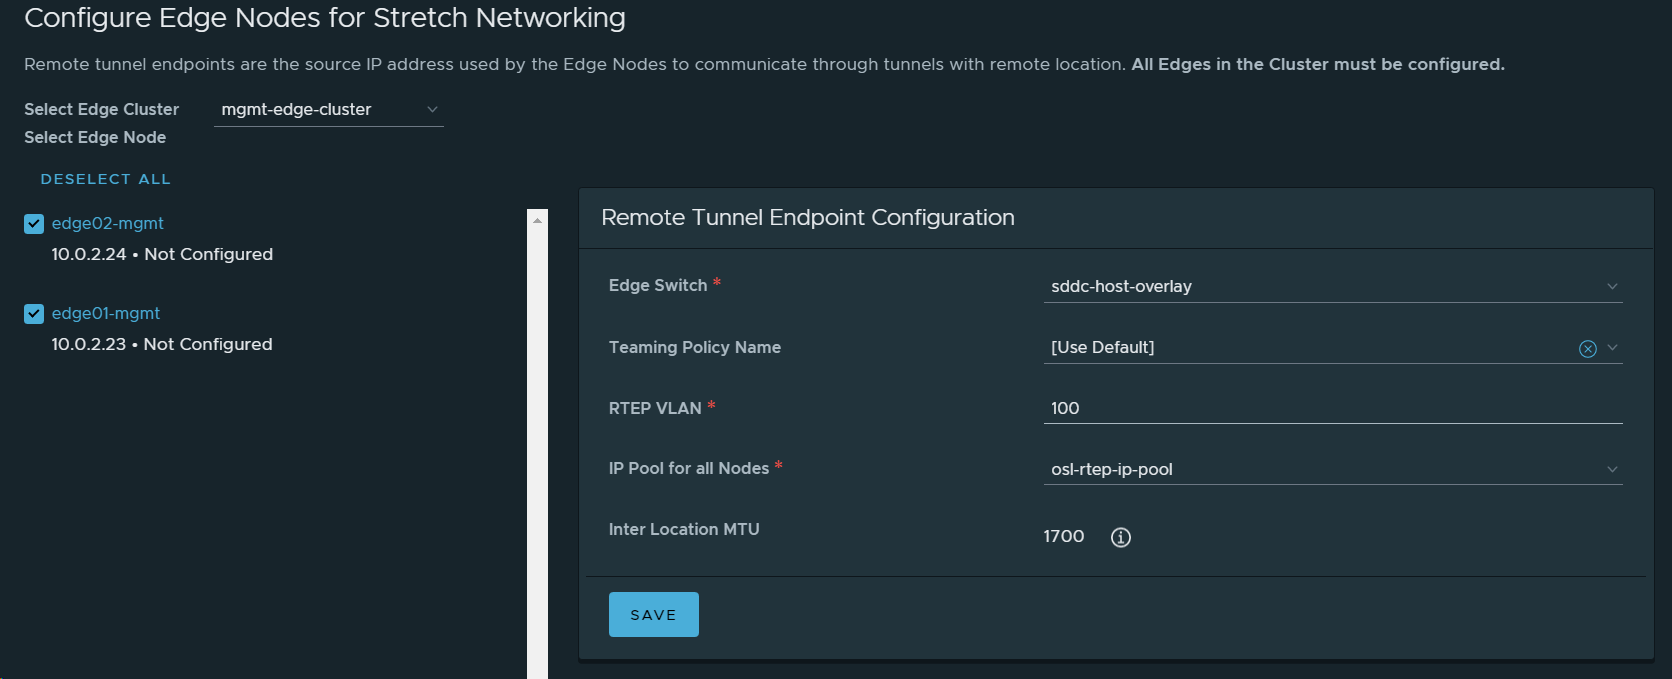
Remote Tunnel Endpoints in OSL looking good.
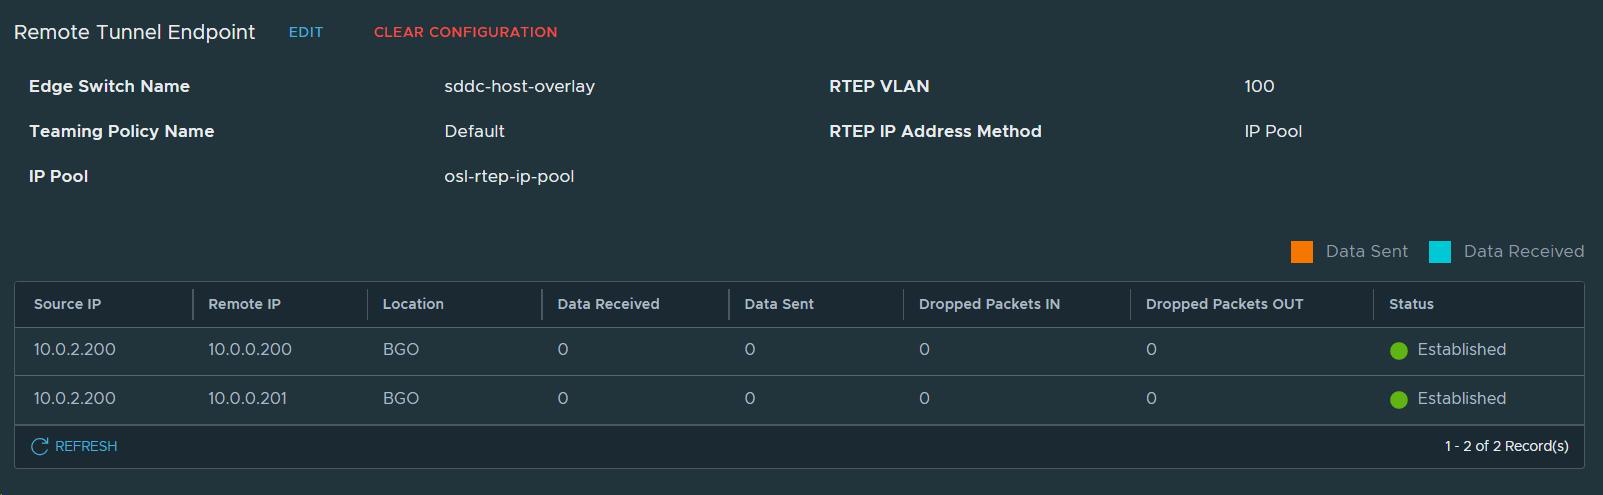
Remote Tunnel Endpoints in BGO also looking good.

18. Imported the NSX-T Local Manager configuration in VCF Instance 2 (OSL) to the NSX-T Global Manager.


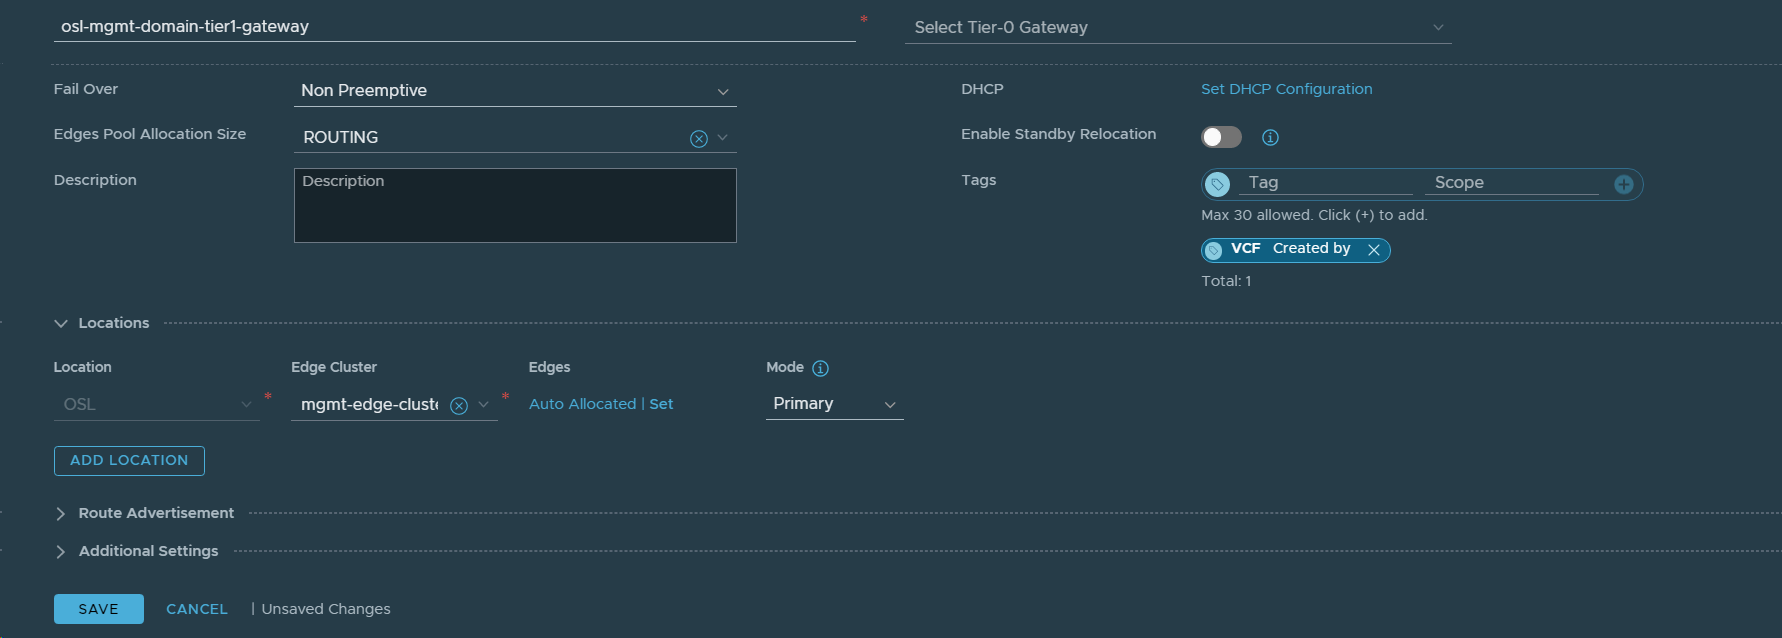
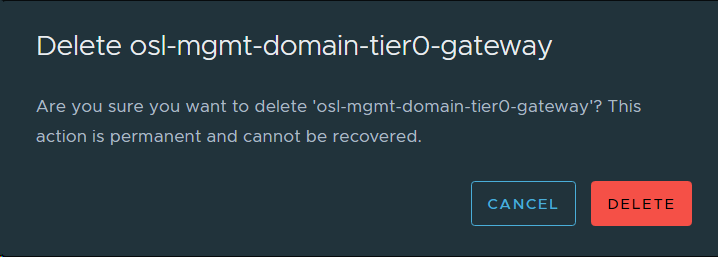
19. Deleted the Existing Tier-0 Gateway for the Management Domain in VCF Instance 2 (OSL). First I had to disconnect the Tier-1 Gateway from the Tier-0 Gateway.
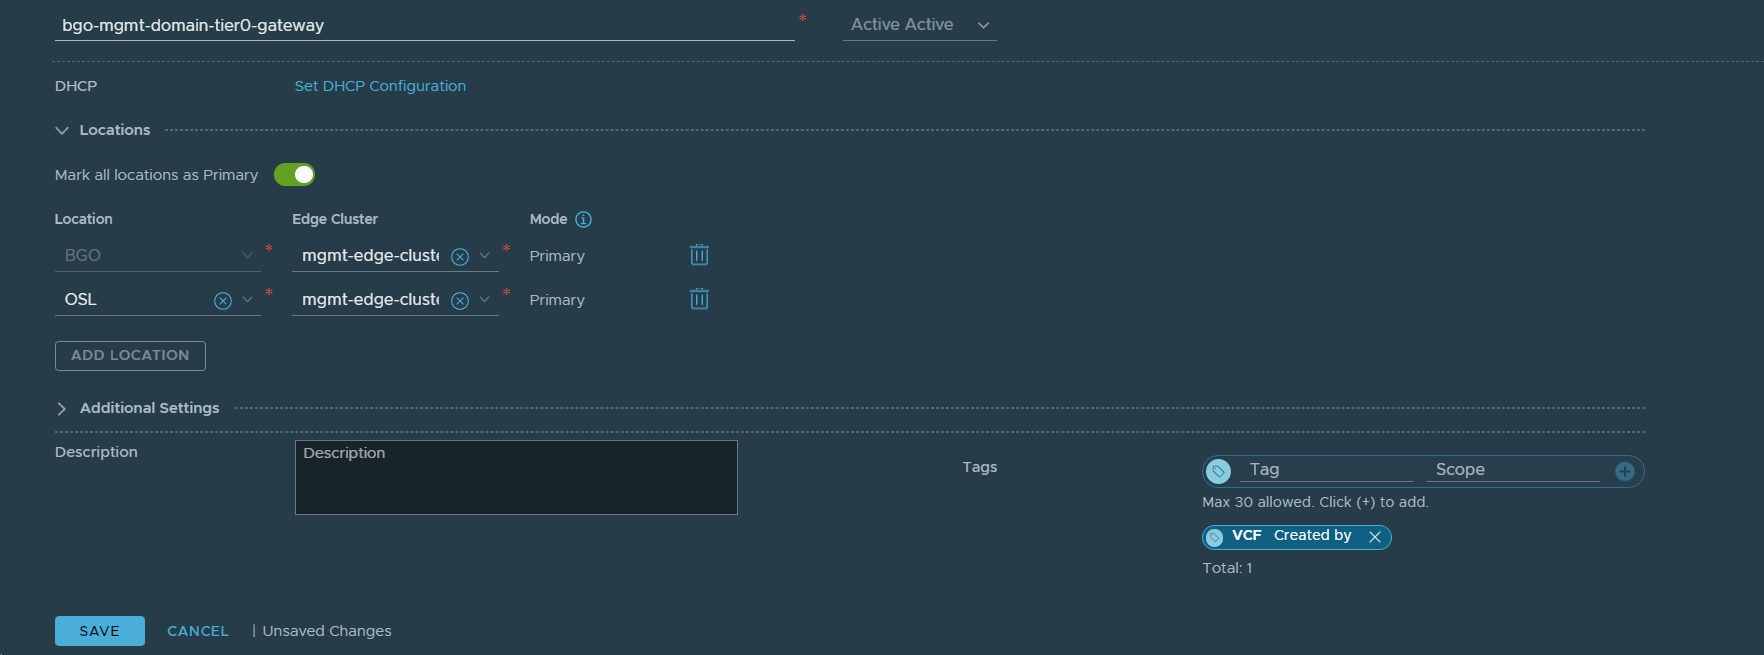
20. Reconfigured the Tier-0 Gateway in VCF Instance 1 (BGO) to stretch the network between VCF Instance 1 (BGO) and VCF Instance 2 (OSL). Added OSL as a Location to existing bgo-mgmt-domain-tier0-gateway.
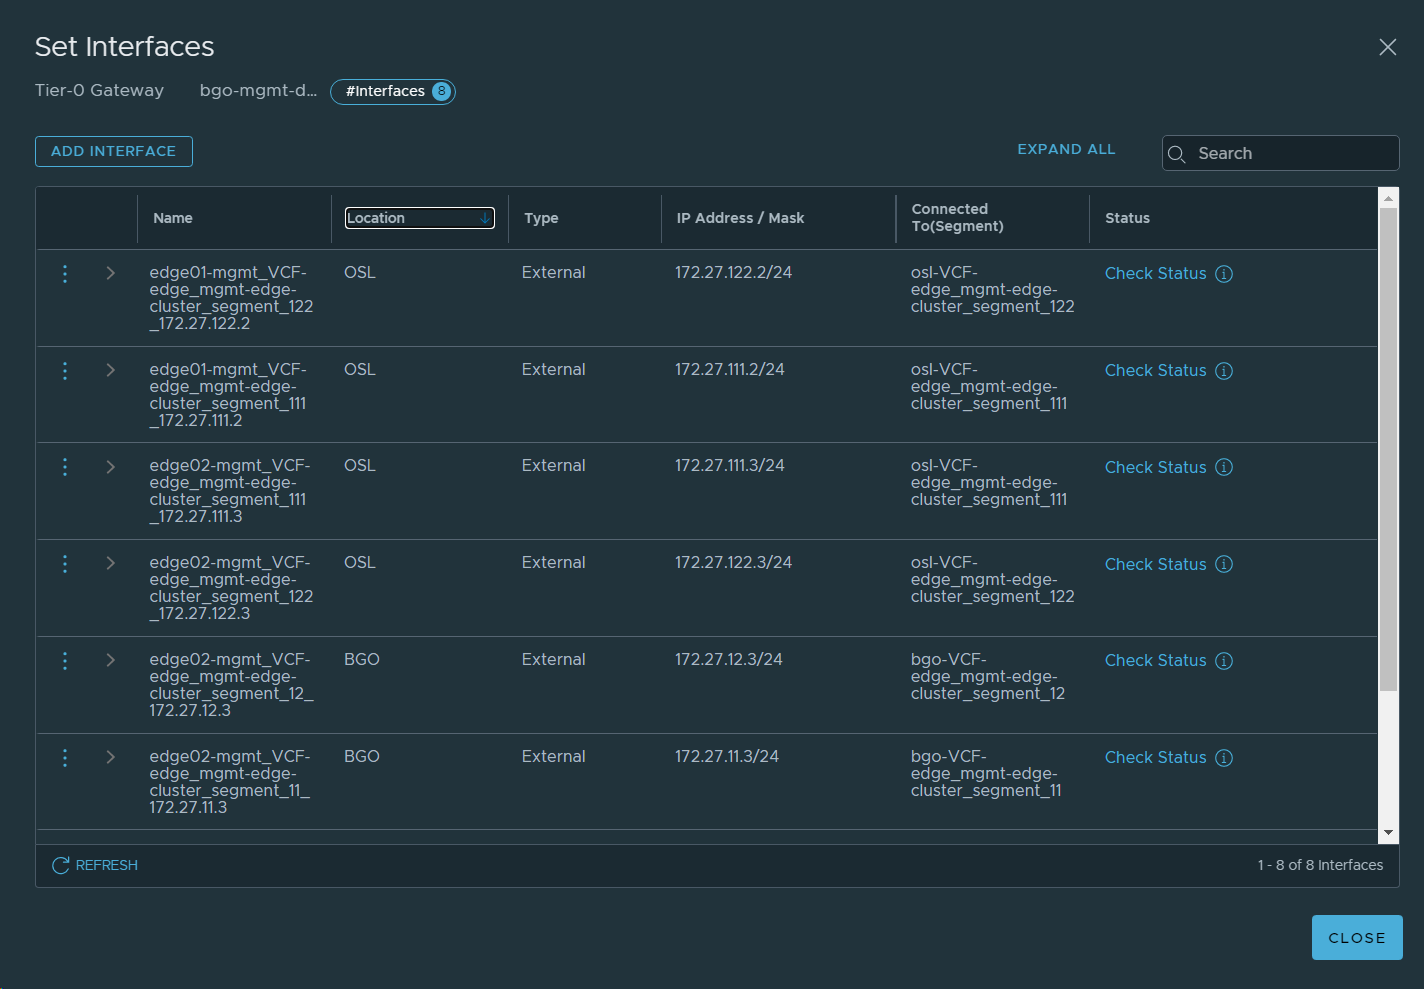
21. Set interfaces for VCF Instance 2 (OSL) on the Tier-0 Gateway.

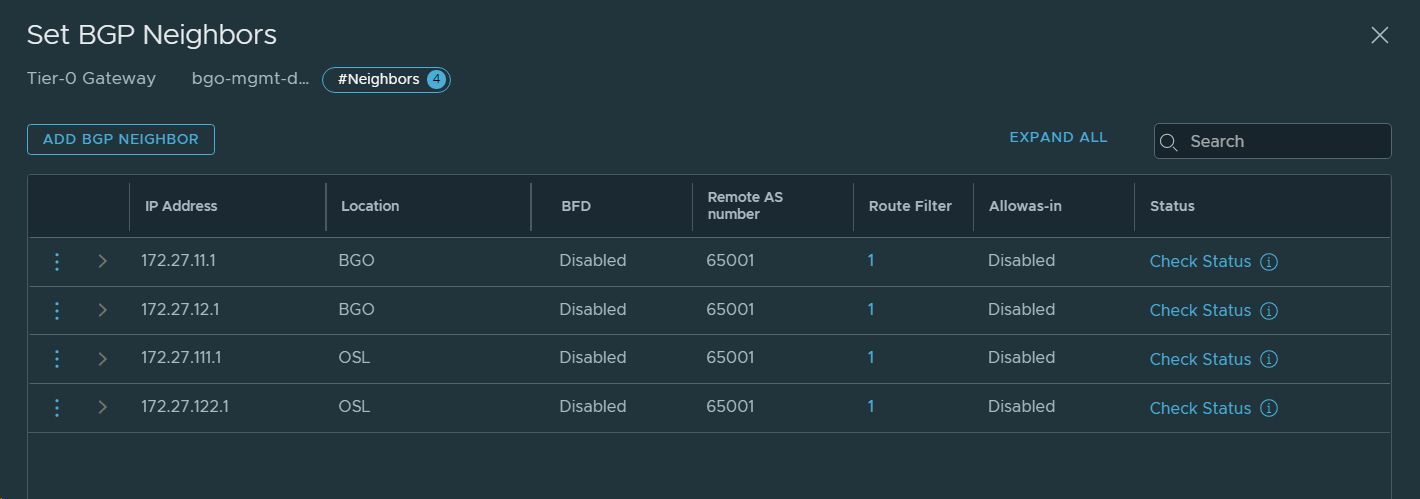
22. Configured BGP neighbors for VCF Instance 2 (OSL).

23. Configured an Any IP Prefix in the Tier-0 Gateway.

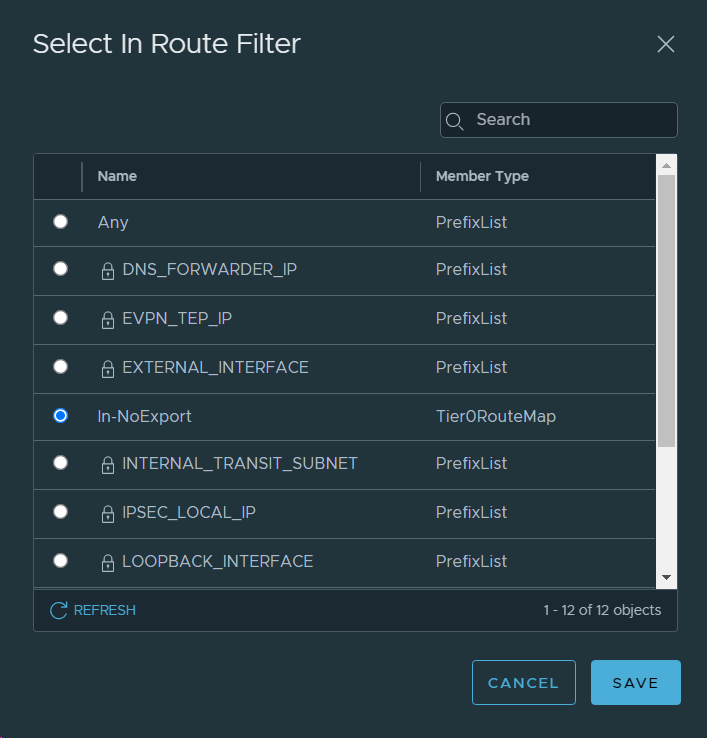
24. Created a Route Map for No Export Traffic in the Tier-0 Gateway.

25. Configured Route Filters and Route Redistribution for BGP. Repeated for all four BGP neighbourships.
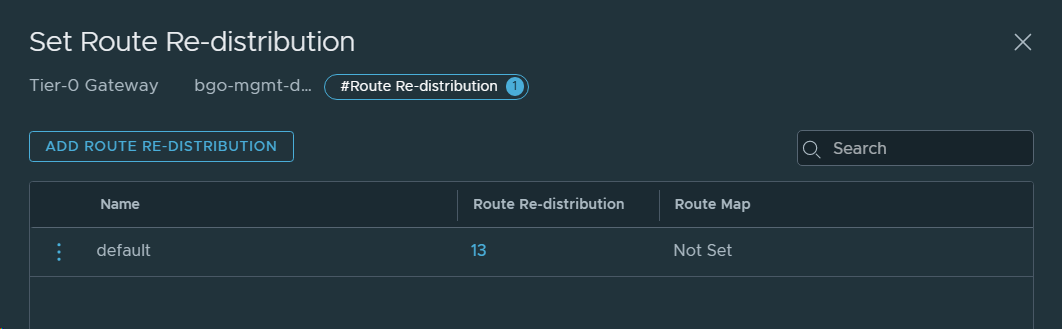
26. Configured route redistribution for VCF Instance 2 (OSL) on the Tier-0 Gateway.
27. Connected the Tier-1 Gateway in VCF Instance 2 (OSL) to the stretched Tier-0 Gateway.

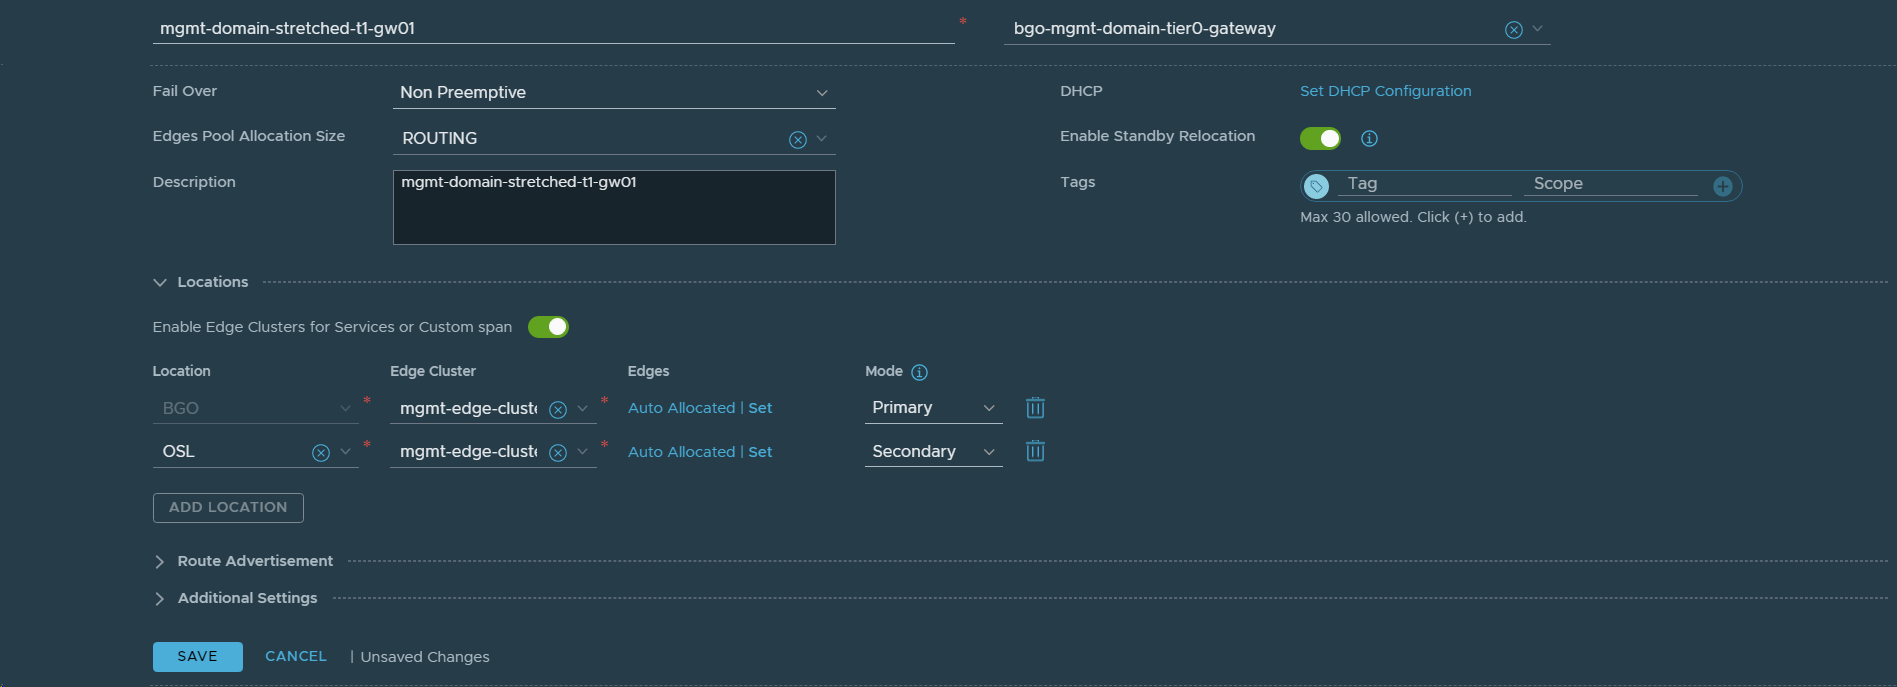
28. Deleted VCF Instance 1 (BGO) as a Location for this Tier-1 Gateway since this is a local only Tier-1 Gateway.

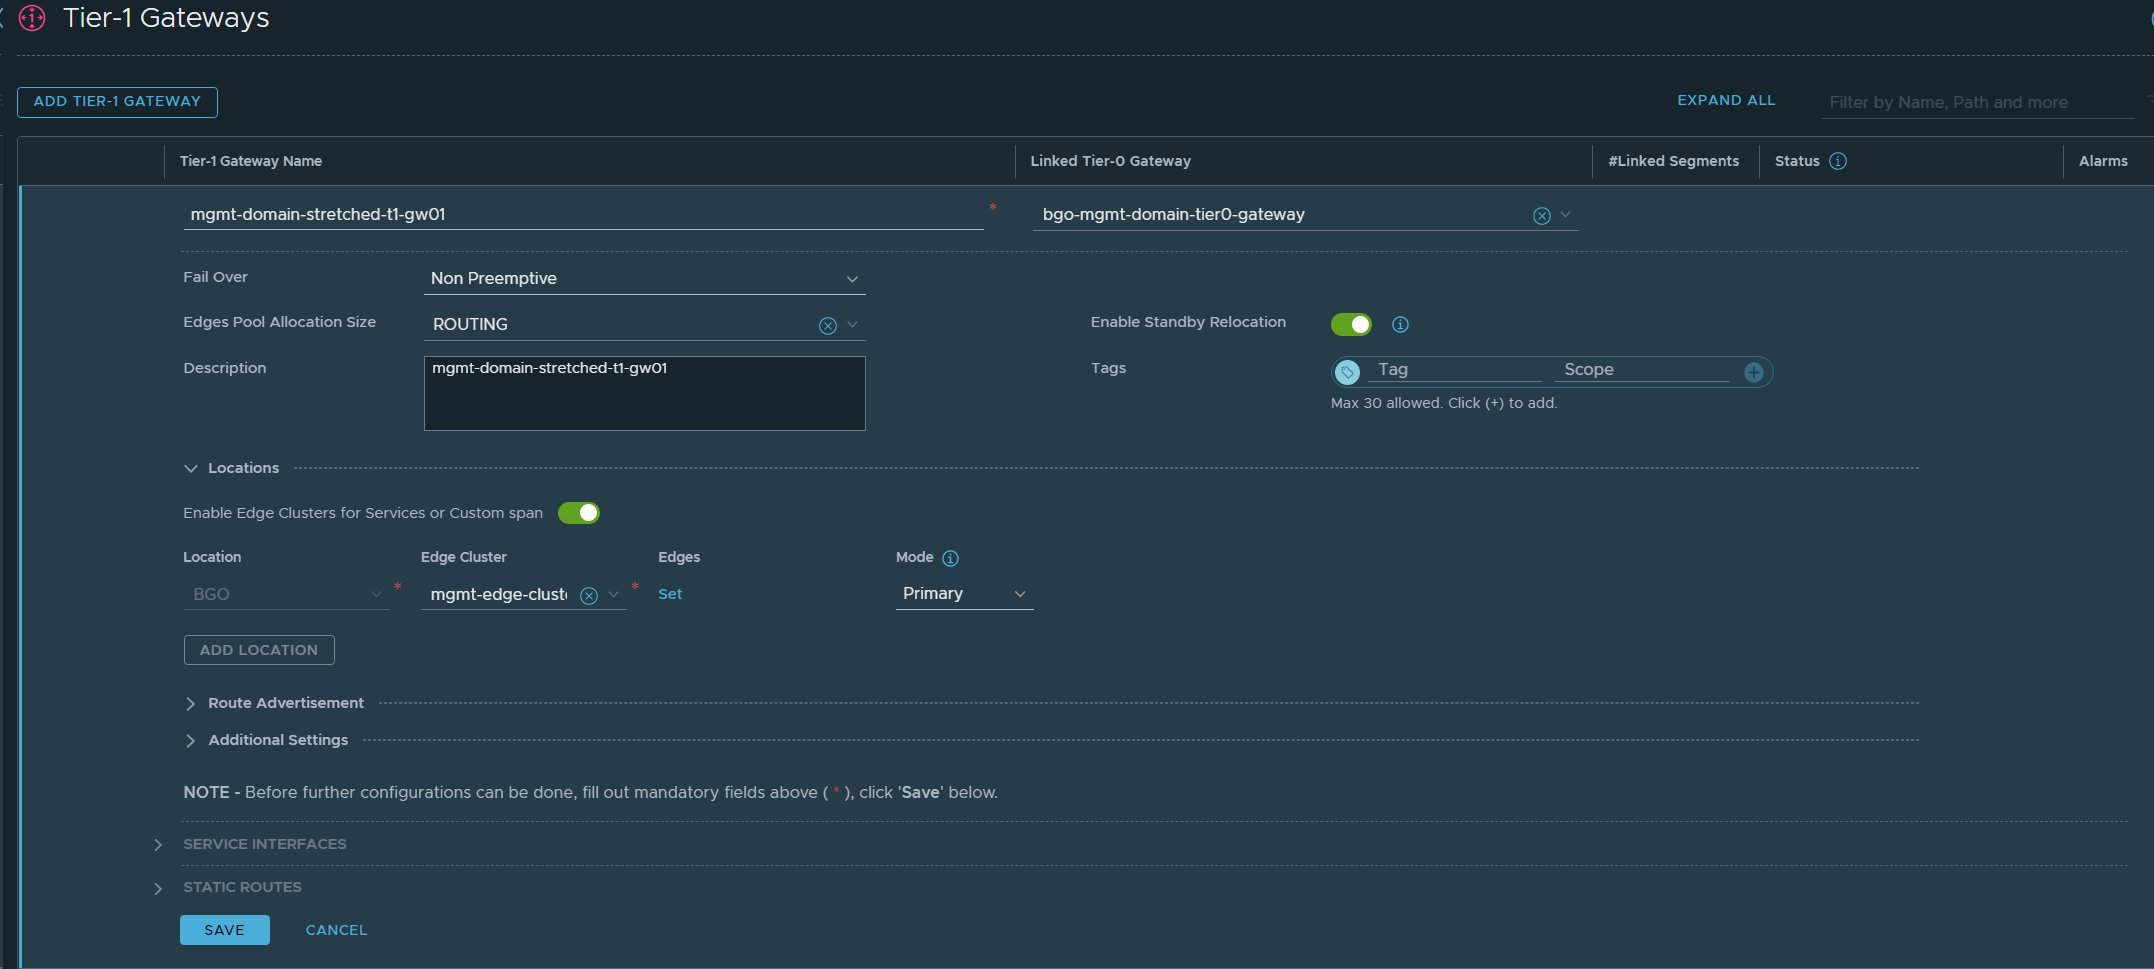
29. Added VCF Instance 2 (OSL) as a Location in the stretched Tier-1 Gateway (mgmt-domain-stretched-t1-gw01).
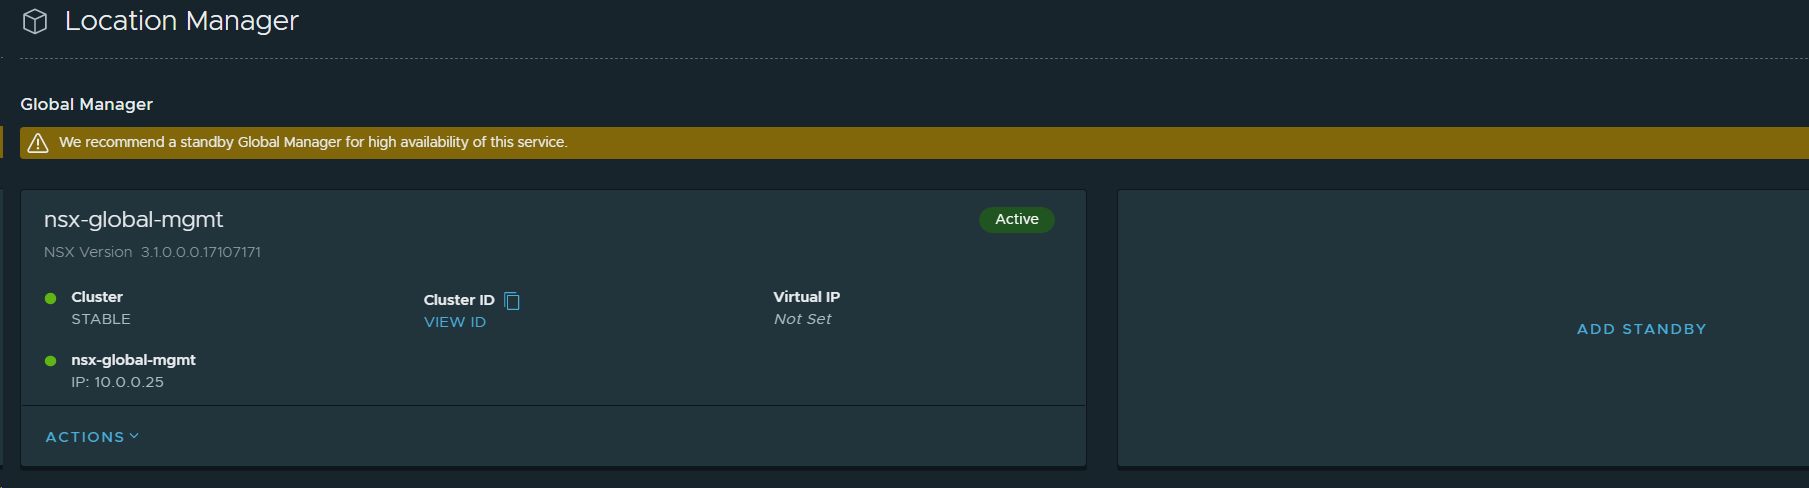
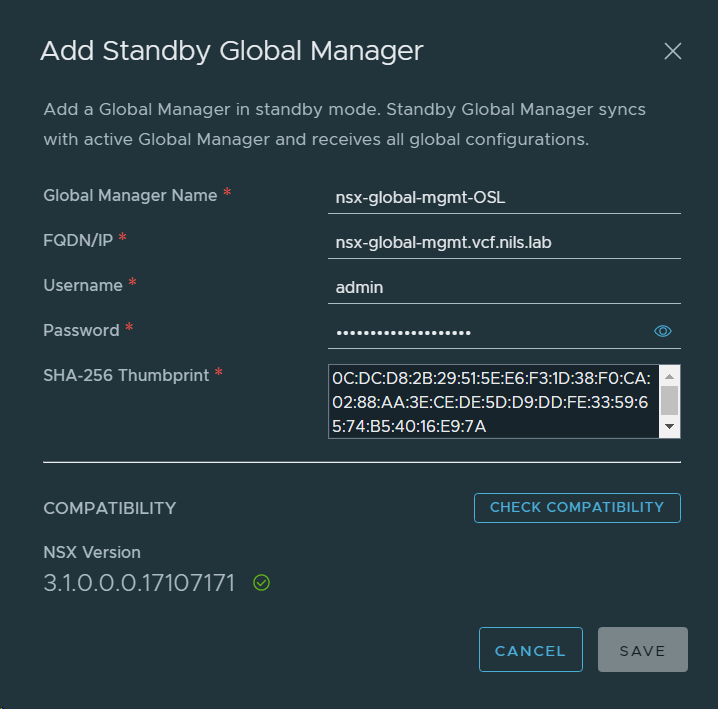
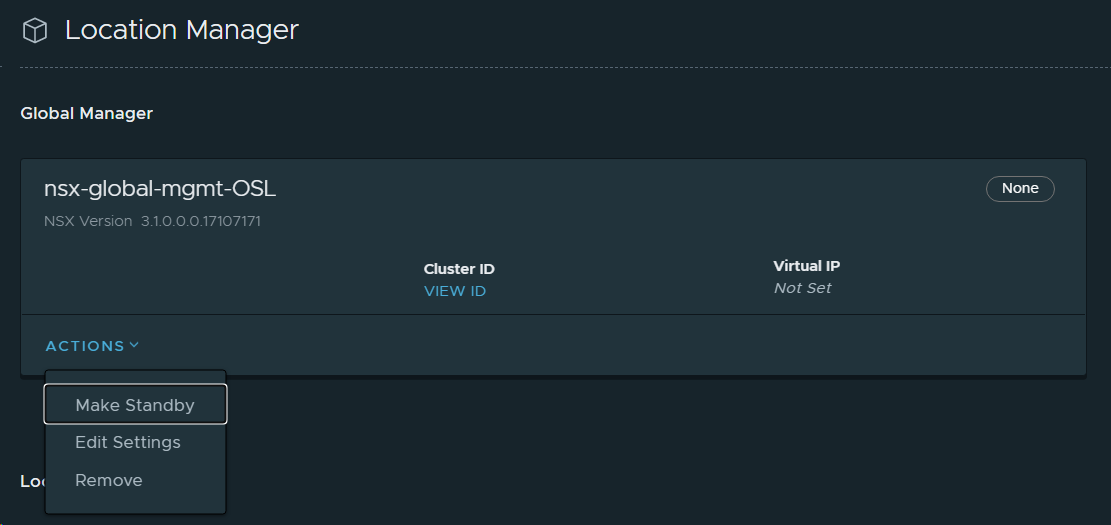
30. Set the NSX-T Global Manager in VCF Instance 2 (OSL) as Standby for the NSX-T Global Manager in VCF Instance 1 (BGO). This provides high availability of the active NSX-T Global Manager.
First step was to retreive the SHA-256 thumbprint of the NSX-T Global Manager certificate in VCF Instance 2 (OSL) using this command from the vCenter Server:
echo -n | openssl s_client -connect nsx-global-mgmt.vcf.nils.lab:443 2>/dev/null | openssl x509 -noout -fingerprint -sha256

Then I added the NSX-T Global Manager in VCF Instance 2 (OSL) as standby.
That’s it! I now have NSX-T Federation between my two VCF Instances which I find very useful. I haven’t done everything required in the VVD to call my instances Region A and Region B, but I can still simulate a lot of cool use cases. Hopefully you found this useful and please let me know if you have any comments or questions.
References
Introducing NSX-T Federation support in VMware Cloud Foundation
Deploy NSX-T Federation for the Management Domain in the Dual-Region SDDC
