“Cannot change immutable field: tier1_lr” error in VMware Cloud Director 10.5.1

We experienced that doing changes to a Virtual Service on a Load Balancer in the VMware Cloud Director (VCD) user interface gave us the following error message after upgrading to VCD 10.5.1:

Cannot change immutable field: tier1_lr

We were using NSX Advanced Load Balancer (ALB) version 22.1.5 Build 9093, but the issue seems to be caused by VCD so ALB version shouldn’t matter.

Deleting the Virtual Service and recreating it worked fine, but this is not an option in a production environment. According to VMware, this issue should have been fixed in VCD 10.5.1.1, so I jumped into the lab running VCD 10.5.0 to verify.

Checked if I could rename a Virtual Service in VCD 10.5.0:

    Worked fine:

    Upgraded VCD to 10.5.1 and tried to rename the Virtual Service again, but this time it failed as expected:

    Upgraded VCD to 10.5.1.1 and now I could successfully rename the Virtual Service:


    If you are using NSX Advanced Load Balancer with VCD, I would recommend skipping version 10.5.1.0 and go straight to 10.5.1.1.

      VMware Cloud Foundation 5.0.0.1 to 5.1 Upgrade Notes

      I recently upgraded a customer from VMware Cloud Foundation (VCF) 5.0.0.1 to 5.1. The upgrade went well in the end, but I had some issues along the way that I would like to share in this quick post.

      The first issue I ran into was that I was unable to select 5.1 as target version and an error message saying “not interopable: ESX_HOST 8.0.2-22380479 -> SDDC_MANAGER 5.0.0.1-22485660“. I found VMware KB95286 which resolved this problem.

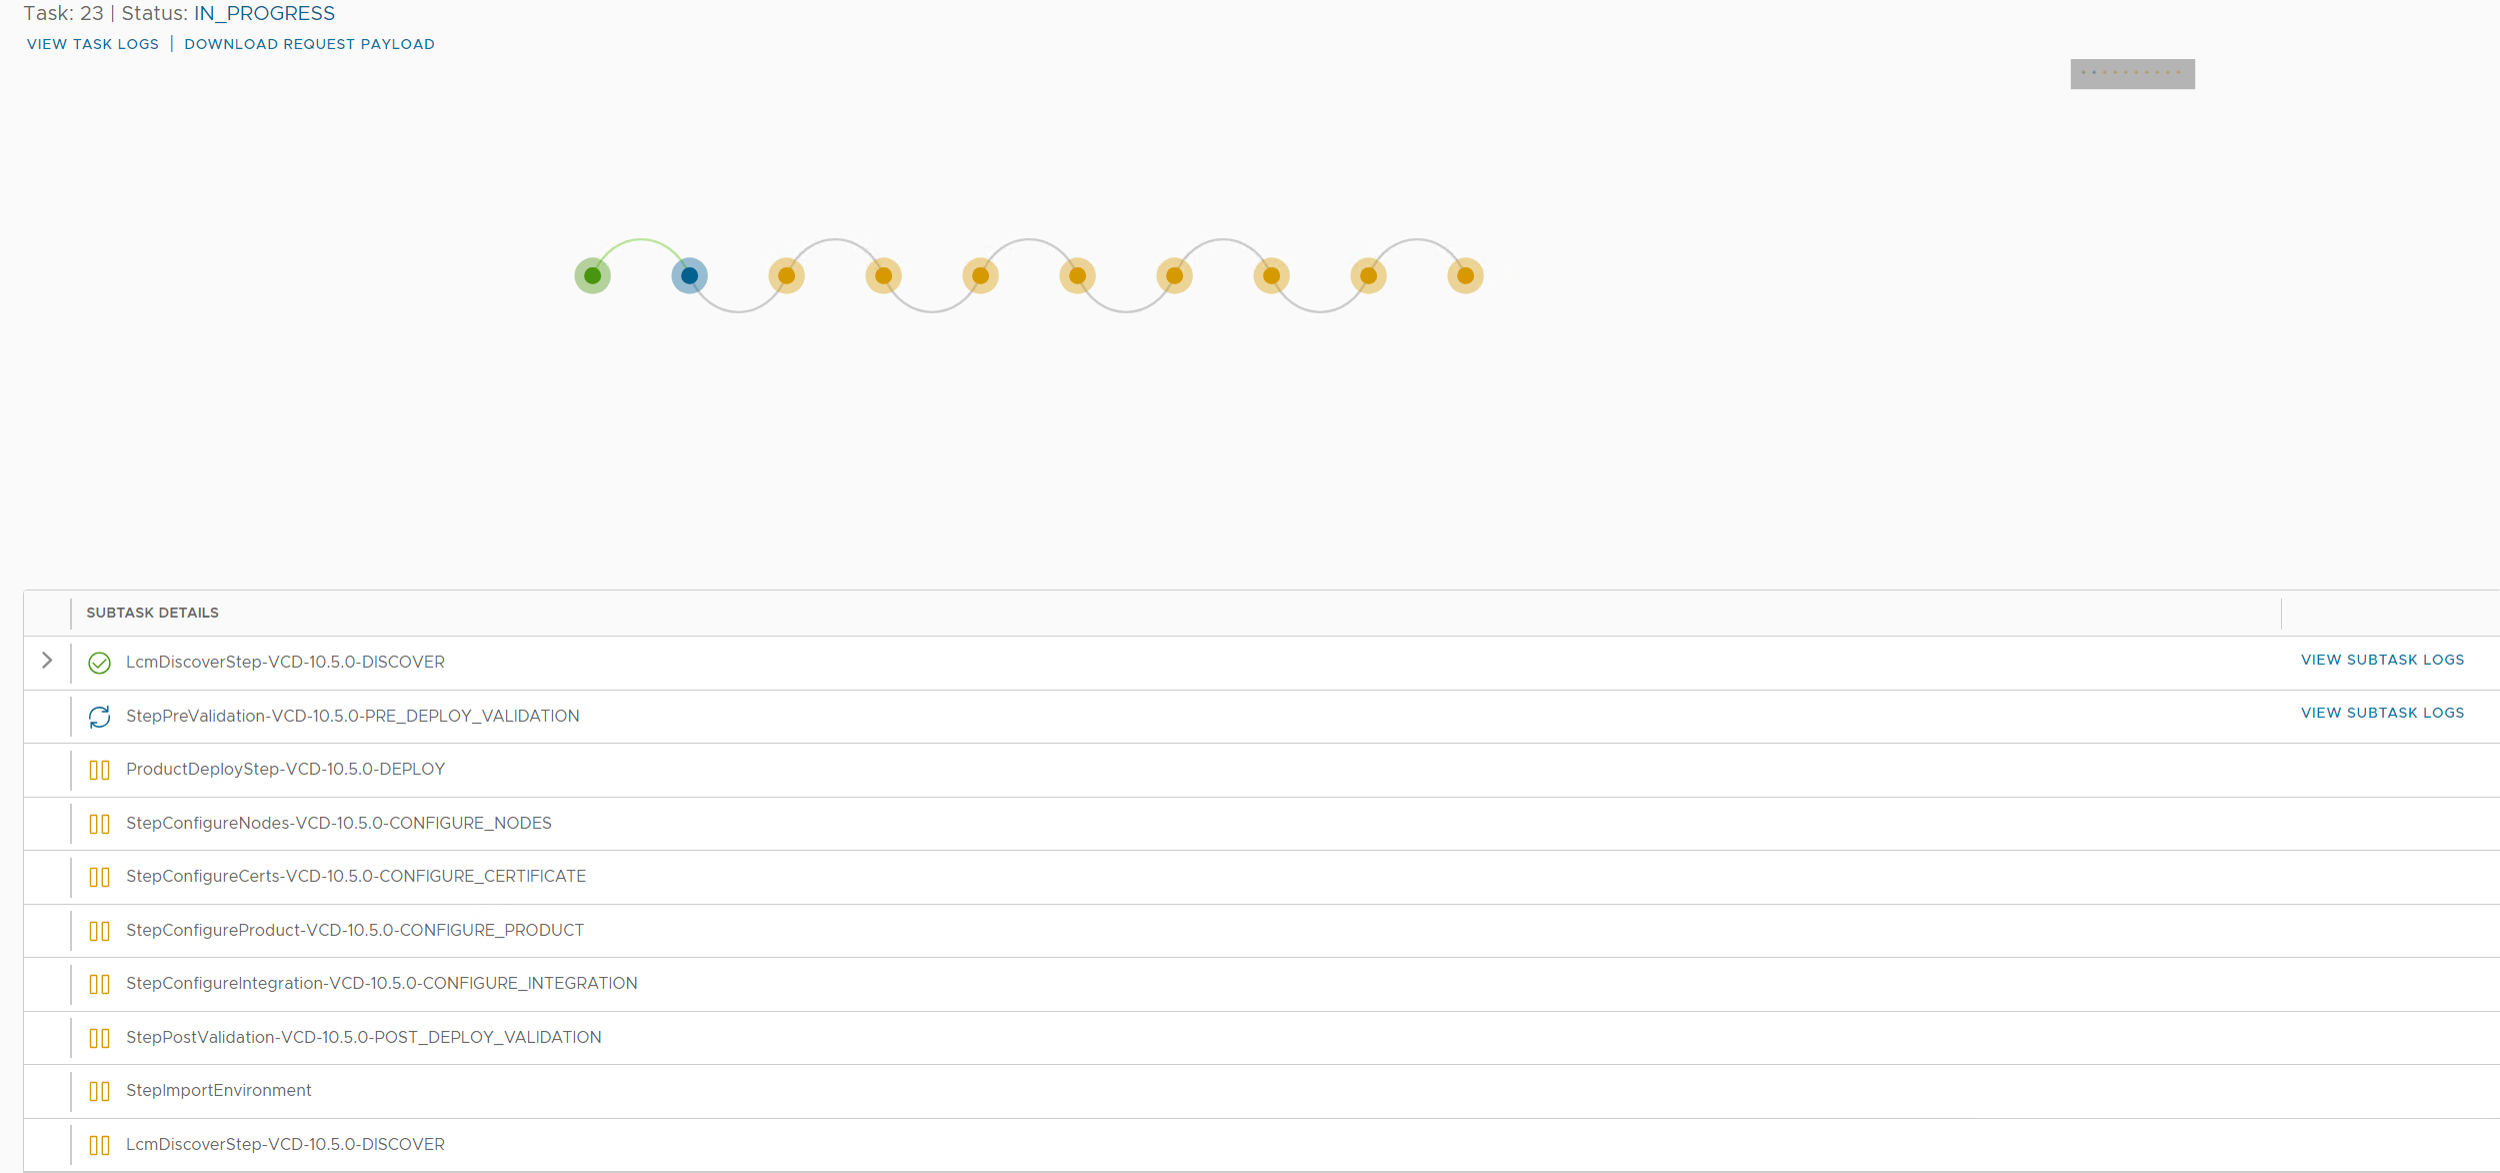
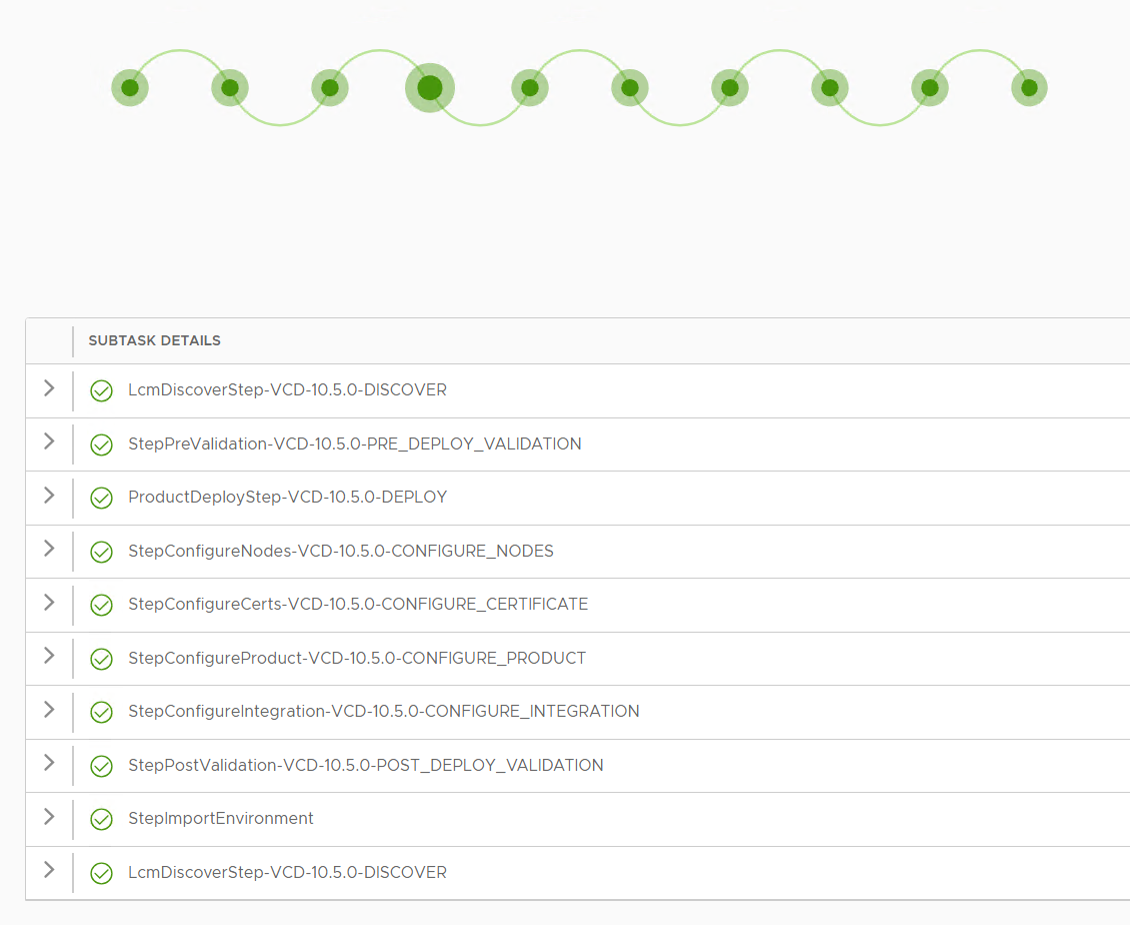
      After the SDDC Manager was upgraded to 5.1, I got the following error message when going to the Updates tab for my Management WLD :

      Retrieving update patches bundles failed. Unable to retrieve aggregated LCM bundles: Encountered error requesting http://127.0.0.1/v1/upgrades api - Encountered error requesting http://127.0.0.1/v1/upgrades api: 500 - "{\"errorCode\":\"VCF_ERROR_INTERNAL_SERVER_ERROR\",\"arguments\":[],\"message\":\"A problem has occurred on the server. Please retry or contact the service provider and provide the reference token.\",\"causes\":[{\"type\":\"com.vmware.evo.sddc.lcm.model.error.LcmException\"},{\"type\":\"java.lang.IllegalArgumentException\",\"message\":\"No enum constant com.vmware.evo.sddc.lcm.model.bundle.BundleSoftwareType.MULTI_SITE_SERVICE\"}],\"referenceToken\":\"H0IKSH\"}"
      Scheduling immediate update of bundle failed. Something went wrong. Please retry or contact the service provider and provide the reference token.

      Going to Bundle Management in SDDC Manager gave me the following error message:

      Retrieving available bundles failed. Unable to retrieve aggregated domains upgrade status: Encountered fetching http://127.0.0.1/lcm/inventory/upgrades api - No enum constant com.vmware.evo.sddc.lcm.model.bundle.BundleSoftwareType.MULTI_SITE_SERVICE
      Retrieving all applicable bundles failed. Encountered fetching http://127.0.0.1/lcm/inventory/upgrades api - No enum constant com.vmware.evo.sddc.lcm.model.bundle.BundleSoftwareType.MULTI_SITE_SERVICE

      Fortunately my colleague Erik G. Raassum had blogged about this issue the day before: https://blog.graa.dev/vCF510-Upgrade

      The solution was to follow VMware KB94760 and Delete all obsolete bundles.

      Next up was that the NSX Precheck failed with the following error message:

      NSX Manager upgrade dry run failed. Do not proceed with the upgrade. Please collect the support bundle and contact VMWare GS. Failed migrations: Starting parallel Corfu Exception during Manager dry-run : Traceback (most recent call last): File "/repository/4.1.2.1.0.22667789/Manager/dry-run/dry_run.py", line 263, in main start_parallel_corfu(dry_run_path) File "/repository/4.1.2.1.0.22667789/Manager/dry-run/dry_run.py", line 150, in start_parallel_corfu subprocess.check_output([str(fullcmd)], File "/usr/lib/python3.8/subprocess.py", line 415, in check_output return run(*popenargs, stdout=PIPE, timeout=timeout, check=True, File "/usr/lib/python3.8/subprocess.py", line 516, in run raise CalledProcessError(retcode, process.args, subprocess.CalledProcessError: Command '['python3 /repository/4.1.2.1.0.22667789/Manager/dry-run/setup_parallel_corfu.py']' returned non-zero exit status 255.

      I digged into the logs without finding anything helpful. I started thinking what the technical geniuses at The IT Crowd would do, so I rebooted all NSX Manager nodes and tried the upgrade again. This time the precheck succeeded for NSX Manager, but it failed for the NSX Edge Nodes with the following error message:

      nkk-c01-ec01 - Edge group upgrade status is FAILED for group 3373386e-5c41-4851-806d-76f0841a5a7d nkk-c01-en01 : [Edge 4.1.2.1.0.22667789/Edge/nub/VMware-NSX-edge-4.1.2.1.0.22667799.nub download OS task failed on edge TransportNode aa134203-1446-4c65-b17f-41c60e325d55: clientType EDGE , target edge fabric node id aa134203-1446-4c65-b17f-41c60e325d55, return status download_os execution failed with msg: Exception during OS download: Command ['/usr/bin/python3', '/opt/vmware/nsx-common/python/nsx_utils/curl_wrapper', '--show-error', '--retry', '6', '--output', '/image/VMware-NSX-edge-4.1.2.1.0.22667799/files/target.vmdk', '--thumbprint', '7aa5bae4a6eddf034c42d0fb77613e9212fec19a7855a8db0af37ed71c3fe7f6', 'https://nkk-c01-nsx01a.cybernils.net/repository/4.1.2.1.0.22667789/Edge/ovf/nsx-edge.vmdk'] returned non-zero code 28: b'curl_wrapper: (28) Failed to connect to nkk-c01-nsx01a.cybernils.net port 443: Connection timed out\n' .].

      A quick status check of all the Edge Nodes didn’t help, so I went ahead and rebooted them all and tried the upgrade again. This time all prechecks went well and the upgrade was also successful without any further issues.

      I also ran into a few issues while upgrading the Aria Suite. After upgrading VMware Aria Suite Lifecycle from version 8.12 to 8.14.1, the Build and Version numbers were not updated even though the upgrade was successful. This was resolved by following VMware KB95231.

      When trying to upgrade Aria Operations for Logs to version 8.14.1, I got the following error message:

      Error Code: LCMVRLICONFIG40004
      Invalid hostname provided for VMware Aria Operations for Logs.
      Invalid hostname provided for VMware Aria Operations for Logs import.

      This was fixed by removing the SHA1 based algorithms and SSH-RSA based keys usage from the SSH service on VMware Aria Operations for Logs following VMware KB95974.

      After upgrading Aria Operations to version 8.14.1, I kept getting the following error message over and over again:

      Client API limit has exceeded the allowed limit.

      Following VMware KB82721 and setting CLIENT_API_RATE_LIMIT to 30 solved this.

      Quite a troublesome upgrade, but at least most of the problems were fixed quickly by either turning something off and on again, or following a KB.

      Upgrade VMware Cloud Director using Cloud Provider Lifecycle Manager

      I wanted to test the NSX Advanced Load Balancer Self-service WAF which came with Cloud Director 10.5.1. My lab was running 10.5.0 so I needed to upgrade. First step was to download VMware_Cloud_Director_10.5.1.10593-22821417_update.tar.gz from VMware and copy it to /cplcmrepo/vcd/10.5.1/update on the Cloud Provider Lifecycle Manager appliance. Then I chose Manage and Upgrade on my deployment, and selected 10.5.1 as the version to upgrade to.

      The Upgrade Task kicked off and I could follow the process in the user interface until it was done.

      After the upgrade was successfully completed, I could log in to Cloud Director and manage WAF on my virtual services.

      Upgrading my Cloud Director cluster using Cloud Provider Lifecycle Manager worked very well and I am sure it is a lot easier and faster than doing it manually. The new WAF self-service feature also looks good and I am sure my customers will be happy for it.

      Using Terraform to Commission Hosts and Creating Clusters in VCF

      I don’t have much experience with Terraform but one of my customers use it a lot and they wanted me to make a proof of concept on how to use it to commission hosts and create a new cluster in VCF. This is a very simple first edition based on examples found here.

      After running terraform apply, we can see in SDDC Manager that it first starts running three Commissioning host(s) tasks in parallel, and when they completed successfully, it started the Adding cluster task to create the new cluster including the three new hosts.

      When the Adding cluster task was Successful, I could find my new healthy cluster in SDDC Manager:

      This is the main.tf file used:

      terraform {
      required_providers {
      vcf = {
      source = "vmware/vcf"
      }
      }
      }

      provider "vcf" {
      sddc_manager_username = var.sddc_manager_username
      sddc_manager_password = var.sddc_manager_password
      sddc_manager_host = var.sddc_manager_host
      }

      resource "vcf_host" "host10" {
      fqdn = var.host_fqdn1
      username = var.host_ssh_user
      password = var.host_ssh_pass
      network_pool_id = "f0edf035-b568-48b0-b056-2b4e94c9f01b"
      storage_type = "VSAN"
      }

      resource "vcf_host" "host11" {
      fqdn = var.host_fqdn2
      username = var.host_ssh_user
      password = var.host_ssh_pass
      network_pool_id = "f0edf035-b568-48b0-b056-2b4e94c9f01b"
      storage_type = "VSAN"
      }

      resource "vcf_host" "host12" {
      fqdn = var.host_fqdn3
      username = var.host_ssh_user
      password = var.host_ssh_pass
      network_pool_id = "f0edf035-b568-48b0-b056-2b4e94c9f01b"
      storage_type = "VSAN"
      }

      resource "vcf_cluster" "cluster1" {
      domain_id = var.domain_id
      name = "mgmt-cluster-02"
      host {
      id = vcf_host.host10.id
      license_key = var.esx_license_key
      vmnic {
      id = "vmnic0"
      vds_name = "mgmt-vds02"
      }
      vmnic {
      id = "vmnic1"
      vds_name = "mgmt-vds02"
      }
      }
      host {
      id = vcf_host.host11.id
      license_key = var.esx_license_key
      vmnic {
      id = "vmnic0"
      vds_name = "mgmt-vds02"
      }
      vmnic {
      id = "vmnic1"
      vds_name = "mgmt-vds02"
      }
      }
      host {
      id = vcf_host.host12.id
      license_key = var.esx_license_key
      vmnic {
      id = "vmnic0"
      vds_name = "mgmt-vds02"
      }
      vmnic {
      id = "vmnic1"
      vds_name = "mgmt-vds02"
      }
      }
      vds {
      name = "mgmt-vds02"
      portgroup {
      name = "sddc-vds02-mgmt"
      transport_type = "MANAGEMENT"
      }
      portgroup {
      name = "sddc-vds02-vsan"
      transport_type = "VSAN"
      }
      portgroup {
      name = "sddc-vds02-vmotion"
      transport_type = "VMOTION"
      }
      }
      vsan_datastore {
      datastore_name = "vcf-vsan-02"
      failures_to_tolerate = 1
      license_key = var.vsan_license_key
      }
      geneve_vlan_id = 10
      }

      This is the variables.tf file:

      variable "sddc_manager_username" {
      description = "Username used to authenticate against an SDDC Manager instance"
      default = "administrator@vsphere.local"
      }

      variable "sddc_manager_password" {
      description = "Password used to authenticate against an SDDC Manager instance"
      default = "VMware123!"
      }

      variable "sddc_manager_host" {
      description = "FQDN of an SDDC Manager instance"
      default = "sddc-manager.vcf.sddc.lab"
      }

      variable "domain_id" {
      description = "VCF Workload Domain id"
      default = "c3e2489c-043e-4f8d-b79a-96b35cb05198"
      }

      variable "esx_license_key" {
      description = "ESXi license key"
      default = "XXXXX-XXXXX-XXXXX-XXXXX-XXXXX"
      }

      variable "vsan_license_key" {
      description = "vSAN license key"
      default = ""XXXXX-XXXXX-XXXXX-XXXXX-XXXXX"
      }

      variable "host_fqdn1" {
      description = "FQDN of an ESXi host that is to be commissioned"
      default = "esxi-10.vcf.sddc.lab"
      }

      variable "host_fqdn2" {
      description = "FQDN of an ESXi host that is to be commissioned"
      default = "esxi-11.vcf.sddc.lab"
      }

      variable "host_fqdn3" {
      description = "FQDN of an ESXi host that is to be commissioned"
      default = "esxi-12.vcf.sddc.lab"
      }

      variable "host_ssh_user" {
      description = "SSH user in ESXi host that is to be commissioned"
      default = "root"
      }

      variable "host_ssh_pass" {
      description = "SSH pass in ESXi host that is to be commissioned"
      default = "VMware123!"
      }

      Here is the output from Terraform:

      C:\Terraform>terraform.exe init
      

      Initializing the backend...

      Initializing provider plugins...
      - Reusing previous version of vmware/vcf from the dependency lock file
      - Using previously-installed vmware/vcf v0.6.0

      Terraform has been successfully initialized!

      You may now begin working with Terraform. Try running "terraform plan" to see
      any changes that are required for your infrastructure. All Terraform commands
      should now work.

      If you ever set or change modules or backend configuration for Terraform,
      rerun this command to reinitialize your working directory. If you forget, other
      commands will detect it and remind you to do so if necessary.

      C:\Terraform>terraform.exe validate
      Success! The configuration is valid.

      C:\Terraform>terraform.exe plan

      Terraform used the selected providers to generate the following execution plan. Resource actions are indicated with the following symbols:
      + create

      Terraform will perform the following actions:

      # vcf_cluster.cluster1 will be created
      + resource "vcf_cluster" "cluster1" {
      + domain_id = "c3e2489c-043e-4f8d-b79a-96b35cb05198"
      + geneve_vlan_id = 10
      + id = (known after apply)
      + is_default = (known after apply)
      + is_stretched = (known after apply)
      + name = "mgmt-cluster-02"
      + primary_datastore_name = (known after apply)
      + primary_datastore_type = (known after apply)

      + host {
      + id = (known after apply)
      + license_key = (sensitive value)

      + vmnic {
      + id = "vmnic0"
      + vds_name = "mgmt-vds02"
      }
      + vmnic {
      + id = "vmnic1"
      + vds_name = "mgmt-vds02"
      }
      }
      + host {
      + id = (known after apply)
      + license_key = (sensitive value)

      + vmnic {
      + id = "vmnic0"
      + vds_name = "mgmt-vds02"
      }
      + vmnic {
      + id = "vmnic1"
      + vds_name = "mgmt-vds02"
      }
      }
      + host {
      + id = (known after apply)
      + license_key = (sensitive value)

      + vmnic {
      + id = "vmnic0"
      + vds_name = "mgmt-vds02"
      }
      + vmnic {
      + id = "vmnic1"
      + vds_name = "mgmt-vds02"
      }
      }

      + vds {
      + name = "mgmt-vds02"

      + portgroup {
      + name = "sddc-vds02-mgmt"
      + transport_type = "MANAGEMENT"
      }
      + portgroup {
      + name = "sddc-vds02-vsan"
      + transport_type = "VSAN"
      }
      + portgroup {
      + name = "sddc-vds02-vmotion"
      + transport_type = "VMOTION"
      }
      }

      + vsan_datastore {
      + datastore_name = "vcf-vsan-02"
      + failures_to_tolerate = 1
      + license_key = (sensitive value)
      }
      }

      # vcf_host.host10 will be created
      + resource "vcf_host" "host10" {
      + fqdn = "esxi-10.vcf.sddc.lab"
      + id = (known after apply)
      + network_pool_id = "f0edf035-b568-48b0-b056-2b4e94c9f01b"
      + password = (sensitive value)
      + status = (known after apply)
      + storage_type = "VSAN"
      + username = "root"
      }

      # vcf_host.host11 will be created
      + resource "vcf_host" "host11" {
      + fqdn = "esxi-11.vcf.sddc.lab"
      + id = (known after apply)
      + network_pool_id = "f0edf035-b568-48b0-b056-2b4e94c9f01b"
      + password = (sensitive value)
      + status = (known after apply)
      + storage_type = "VSAN"
      + username = "root"
      }

      # vcf_host.host12 will be created
      + resource "vcf_host" "host12" {
      + fqdn = "esxi-12.vcf.sddc.lab"
      + id = (known after apply)
      + network_pool_id = "f0edf035-b568-48b0-b056-2b4e94c9f01b"
      + password = (sensitive value)
      + status = (known after apply)
      + storage_type = "VSAN"
      + username = "root"
      }

      Plan: 4 to add, 0 to change, 0 to destroy.

      ─────────────────────────────────────────────────────────────────────────────────────────────────────────────────────────────────────────────────────────────────────────────────────────────────────────────────────────────────────────────────────────────────────────────────────────

      Note: You didn't use the -out option to save this plan, so Terraform can't guarantee to take exactly these actions if you run "terraform apply" now.

      C:\Terraform>terraform.exe apply

      Terraform used the selected providers to generate the following execution plan. Resource actions are indicated with the following symbols:
      + create

      Terraform will perform the following actions:

      # vcf_cluster.cluster1 will be created
      + resource "vcf_cluster" "cluster1" {
      + domain_id = "c3e2489c-043e-4f8d-b79a-96b35cb05198"
      + geneve_vlan_id = 10
      + id = (known after apply)
      + is_default = (known after apply)
      + is_stretched = (known after apply)
      + name = "mgmt-cluster-02"
      + primary_datastore_name = (known after apply)
      + primary_datastore_type = (known after apply)

      + host {
      + id = (known after apply)
      + license_key = (sensitive value)

      + vmnic {
      + id = "vmnic0"
      + vds_name = "mgmt-vds02"
      }
      + vmnic {
      + id = "vmnic1"
      + vds_name = "mgmt-vds02"
      }
      }
      + host {
      + id = (known after apply)
      + license_key = (sensitive value)

      + vmnic {
      + id = "vmnic0"
      + vds_name = "mgmt-vds02"
      }
      + vmnic {
      + id = "vmnic1"
      + vds_name = "mgmt-vds02"
      }
      }
      + host {
      + id = (known after apply)
      + license_key = (sensitive value)

      + vmnic {
      + id = "vmnic0"
      + vds_name = "mgmt-vds02"
      }
      + vmnic {
      + id = "vmnic1"
      + vds_name = "mgmt-vds02"
      }
      }

      + vds {
      + name = "mgmt-vds02"

      + portgroup {
      + name = "sddc-vds02-mgmt"
      + transport_type = "MANAGEMENT"
      }
      + portgroup {
      + name = "sddc-vds02-vsan"
      + transport_type = "VSAN"
      }
      + portgroup {
      + name = "sddc-vds02-vmotion"
      + transport_type = "VMOTION"
      }
      }

      + vsan_datastore {
      + datastore_name = "vcf-vsan-02"
      + failures_to_tolerate = 1
      + license_key = (sensitive value)
      }
      }

      # vcf_host.host10 will be created
      + resource "vcf_host" "host10" {
      + fqdn = "esxi-10.vcf.sddc.lab"
      + id = (known after apply)
      + network_pool_id = "f0edf035-b568-48b0-b056-2b4e94c9f01b"
      + password = (sensitive value)
      + status = (known after apply)
      + storage_type = "VSAN"
      + username = "root"
      }

      # vcf_host.host11 will be created
      + resource "vcf_host" "host11" {
      + fqdn = "esxi-11.vcf.sddc.lab"
      + id = (known after apply)
      + network_pool_id = "f0edf035-b568-48b0-b056-2b4e94c9f01b"
      + password = (sensitive value)
      + status = (known after apply)
      + storage_type = "VSAN"
      + username = "root"
      }

      # vcf_host.host12 will be created
      + resource "vcf_host" "host12" {
      + fqdn = "esxi-12.vcf.sddc.lab"
      + id = (known after apply)
      + network_pool_id = "f0edf035-b568-48b0-b056-2b4e94c9f01b"
      + password = (sensitive value)
      + status = (known after apply)
      + storage_type = "VSAN"
      + username = "root"
      }

      Plan: 4 to add, 0 to change, 0 to destroy.

      Do you want to perform these actions?
      Terraform will perform the actions described above.
      Only 'yes' will be accepted to approve.

      Enter a value: yes

      vcf_host.host10: Creating...
      vcf_host.host12: Creating...
      vcf_host.host11: Creating...

      VCF 4.5.1 to 5.0.0.1 Upgrade Notes

      I recently upgraded a customer from VMware Cloud Foundation 4.5.1 to 5.0.0.1. The upgrade went well in the end, but I had some issues along the way that I would like to share in this quick post.

      1. When upgrading SDDC Manager, we get a nice status page telling us what it is currently doing. Suddenly the following disturbing message popped up:

        "Retrieving update detail failed. VCF services are not available.Unable to retrieve aggregated upgrade details: Failed to request http://127.0.0.1/inventory/domains api - undefined"

        Checking /var/log/vmware/vcf/lcm/lcm.log and lcm-debug.log didn’t give me any other clues than that the services were probably being restarted as part of the upgrade, so after refreshing my browser a couple of times the message went away.
         
      2. About 30 minutes into the NSX upgrade, the following error message popped up:

        "bgo-c01-ec01 in bgo-c01 domain failed upgrade at Nov 29, 2023, 9:23:41 AM. Please resolve the above upgrade failure for this bundle before applying any other available bundle."

        Checking the task in SDDC Manager gave me some more details:

        "bgo-c01-ec01 - NSX upgrade precheck timedout. Check for errors in the LCM log files at 127.0.0.1:/var/log/vmware/vcf/lcm, and address those errors. Check if the SDDC Manager is able to communicate with NSX Manager. If not, login to NSX and check if upgrade is running and wait for the completion. Please run the upgrade precheck and restart the upgrade."

        I logged into NSX Manager and did a health check without finding any problems. Checking the Upgrade page showed that the Edge precheck was still running with status "Checked 2 of 2". I let this run for several hours but it never finished. Manually stopping the precheck also never finished, so I rebooted all the NSX appliances to cancel it. I then retried the NSX upgrade but the same error happened again after about 30 minutes.

        After some research I found VMware KB91629, but it did not apply to my environment as I could not find "certificate expired" in /var/log/upgrade-coordinator/logical-migration.log and my certificate was still valid for 98 years. After talking to VMware Support we did the workaround in the KB anyway, and this made the NSX upgrade move on and complete successfully.
         
      3. Logging in to NSX Manager after the upgrade completed showed me 27 alarms about expired certificates. I quickly found that VMware KB93296 matched my environment so I contacted VMware Support. They instructed me to use the following doc to replace the certificates so not sure why the KB instructs us to contact them, but it could be that they want to make sure that only certain certifcates that can be safely replaced have expired: https://docs.vmware.com/en/VMware-NSX/4.1/administration/GUID-50C36862-A29D-48FA-8CE7-697E64E10E37.html#GUID-50C36862-A29D-48FA-8CE7-697E64E10E37

      Hopefully you won’t run into these issues at all, but if you do, perhaps this post can help you move on a bit faster on your road towards VCF 5.0.

      Deploy VMware Cloud Director using Cloud Provider Lifecycle Manager

      I have recently started working with a VMware Cloud Service Provider where I have the role as an architect. They are running VMware Cloud Director (VCD) on top of VMware Cloud Foundation (VCF), and while I have quite a bit of experience with VCF, I haven’t worked a lot with VCD so I thought I should install it in my lab to get some experience with it and have a test bed for future exploration.

      This post will show you how I deployed VMware Cloud Provider Lifecycle Manager, then using it to deploy VMware Cloud Director 10.5. Everything will be deployed into a cluster running on VMware Cloud Foundation 5.0. VCD can be deployed manually but I decided to use VMware Cloud Provider Lifecycle Manager for the following features:

      • Deploy VMware Cloud Director, VMware Chargeback, RabbitMQ, and vCloud Usage Meter using manual input or a json file.
      • Redeploy a Product Node.
      • Add a new node to an existing product deployment.
      • Change passwords.
      • Manage Product Certificates.
      • Add VCD integrations.
      • Upgrade VMware Cloud Director, VMware Chargeback, RabbitMQ, and vCloud Usage Meter.
      • Activate and deactivate a maintenance mode status for VMware Cloud Director cells.

      Cloud Provider Lifecycle Manager must be downloaded as an OVF file from VMware and deployed in vSphere. There is not much to be configured during the deployment, but I chose to connect it to my Region-A segment which is one of the Application Virtual Networks that VCF deploys. Most of the settings are self-explanatory but when asked to provide “NFS share to mount as VCP LCM repository” you may choose to leave it blank and it will use a local directory on the appliance instead. This is ok for lab purposes but not in a production environment.

      VMware Cloud Provider Lifecycle Manager creates a separate repository directory for every product that the appliance can manage. Deployment OVA files should be uploaded to /cplcmrepo/product-type/version-number/ova, and update OVA files should be uploaded to /cplcmrepo/product-type/version-number/update. I started with uploading the “VMware Cloud Director 10.5 - Virtual Appliance Installation or Migration” OVA file.

      I logged in to the user interface at https://cloud-lcm.vcf.sddc.lab/ using the vcplcm user, then registered my vCenter and NSX-T Manager under the Infrastructures tab:

      My intention was to deploy a VMware Cloud Director Appliance Database HA Cluster with one Primary cell and two Standby cells like this:

      I had already set up an NSX-T Load Balancer to use with the VCD cluster according to this doc.

      One single SSL certificate was created using https://certificatetools.com/, imported into NSX-T Manager, added to the LB, and used when deploying VCD.

      Selecting the Deployments tab and choosing Add New Deployment let me deploy VMware Cloud Director 10.5:

      After filling inn all the details, I clicked on Validate and got validation result SUCCESS. Then I chose to click on EXPORT to export my config to a json file. This can be used for documentation purposes or used to redeploy at a later time. I selected Deploy to start the deployment. This gave me the following status screen where we can see all steps required to finish the task. Note the VIEW SUBTASKS LOG link on the right hand where we can see details about a subtask. This is very handy when troubleshooting a failed task. Note that you can also RESTART a failed task after fixing whatever caused it to fail.

      The Product Deploy Step failed after it had deployed the first VCD appliance, but I was able to log in to the appliance and check the /opt/vmware/var/log/firstboot log file and found that the appliance was unable to resolve itself in DNS. Nslookup worked fine from the appliance, and after some troubleshooting I found that it requires to resolve DNS records using TCP and not only using UDP. The command nslookup -vc vcd1.vcf.sddc.lab confirmed that it could not resolve using TCP, and after fixing my DNS server to support TCP, I did another try and this time the deployment succeeded:

      Expanding any of the Steps above will uncover quite an extensive list of subtasks taken care of by the Cloud Provider Lifecycle Manager. I don’t have experience with deploying Cloud Director manually but I am quite certain we can save quite some time using this deployment method.

      Pointing my browser to https://portal.vcf.sddc.lab/ took me directly to the Cloud Director login page:

      Since I didn’t have any Organizations configured yet I went to https://portal.vcf.sddc.lab/provider and logged in with Administrator to see if everything looked good:

      Looks like I have a blank VCD environment ready for action!

      I also logged inn with root at https://vcd1.vcf.sddc.lab:5480/cluster to check the status of the appliances:

      Seems like Cloud Provider Lifecycle Manager successfully deployed a healthy cluster with three Cloud Director cells.

      I will now spend some time setting up Cloud Director and learn more about it.

      iperf3 on VMware ESXi 8 gives “Operation not permitted” error message

      I have been using iperf3 to test network performance between ESXi hosts or between an ESXi host and another device running iperf3. Earlier we could simply copy the iperf3 file to a new file like iperf3.copy and run that but this no longer work in ESXi 8 due to security being hardened.

      Here is a way to still be able to use iperf3 in ESXi 8.

      ESXi shell command to run on the host acting as the iperf3 server:

      esxcli network firewall set --enabled false
      localcli system settings advanced set -o /User/execInstalledOnly -i 0
      
      cp /usr/lib/vmware/vsan/bin/iperf3 /usr/lib/vmware/vsan/bin/iperf3.copy
      /usr/lib/vmware/vsan/bin/iperf3.copy -s -B 192.168.0.111
      
      localcli system settings advanced set -o /User/execInstalledOnly -i 1
      esxcli network firewall set --enabled true

      ESXi shell commands to run on the host acting as the iperf3 client:

      esxcli network firewall set --enabled false
      localcli system settings advanced set -o /User/execInstalledOnly -i 0
      
      cp /usr/lib/vmware/vsan/bin/iperf3 /usr/lib/vmware/vsan/bin/iperf3.copy
      /usr/lib/vmware/vsan/bin/iperf3.copy -i 1 -t 10 -c 192.168.0.111
      
      localcli system settings advanced set -o /User/execInstalledOnly -i 1
      esxcli network firewall set --enabled true

      Boot VMware ESXi from NVMe on servers not supporting NVMe boot

      I have a Dell PowerEdge T440 which doesn’t support booting ESXi directly from my PCIe NVMe drive. This server does not have any other controllers or drives, so my only option is to boot it from USB/SD. Since booting ESXi from USB/SD is deprecated I found another solution. Clover is a bootloader with many features including booting an OS from an NVMe drive on systems not supporting booting from NVMe. Clover itself boots from USB and then starts ESXi from the NVMe drive. Note that this is not the same as installing ESXi on a USB drive and booting it directly. Using Clover makes ESXi unaware that the server is booting from USB and no constraints will be put in place compared to booting directly from the NVMe drive.

      Here is how to do it:

      1. Install ESXi on your NVMe device.
      2. Format a USB drive with FAT32.
      3. Download CloverV2-5154.zip from here and extract it to your USB drive: https://github.com/CloverHackyColor/CloverBootloader/releases
      4. Copy /EFI/CLOVER/drivers/off/UEFI/Other/NvmExpressDxe.efi to /EFI/CLOVER/drivers/UEFI/NvmExpressDxe.efi on the USB drive.
      5. Boot your server from the USB drive and press F3 in Clover to display any hidden devices. Try to boot the devices to figure out which one is your NVMe device containing ESXi. If you get problems, pressing F2 will write the log file to the \EFI\CLOVER\misc folder.

      To make Clover boot from your NVMe device automatically without having to press F3 and manually selecting your device, follow these steps:

      1. Boot your server from the USB drive one more time. Press F3 in Clover, select your device and press the space bar to show details about your device. Record the UUID.

      1. Create the following xml file on your USB drive: D:\EFI\CLOVER\config.plist and populate it according to the following doc: https://sourceforge.net/p/cloverefiboot/wiki/Configuration/

      Here is a copy of my config file which makes Clover boot ESXi automatically from my NVMe:

      <?xml version="1.0" encoding="UTF-8"?>
      <!DOCTYPE plist PUBLIC "-//Apple//DTD PLIST 1.0//EN" "http://www.apple.com/DTDs/PropertyList-1.0.dtd">
      <plist version="1.0">
      <dict>
        <key>Boot</key>
        <dict>
          <key>Timeout</key>
          <integer>0</integer>
          <key>DefaultLoader</key>
          <string>\EFI\BOOT\BOOTX64.efi</string>
      	<key>DefaultVolume</key>
          <string>6A2A495E-4B5D-4BA4-A8B9-EAF504DB3656</string>
        </dict>
        <key>GUI</key>
        <dict>
          <key>Custom</key>
          <dict>
            <key>Entries</key>
            <array>
              <dict>
                <key>Path</key>
                <string>\EFI\BOOT\BOOTX64.efi</string>
                <key>Title</key>
                <string>ESXi</string>
                <key>Type</key>
                <string>Linux</string>
                <key>Volume</key>
                <string>6A2A495E-4B5D-4BA4-A8B9-EAF504DB3656</string>
                <key>VolumeType</key>
                <string>Internal</string>
              </dict>
            </array>
          </dict>
        </dict>
      </dict>
      </plist>
      

      You must replace the Volume string with your own UUID that you recorded previously.

      Extending My VCF Lab Across Multiple Physical Hosts

      I have been running VMware Cloud Foundation (VCF) in a lab for a few years now. It has always been running on a single physical host. This is fine as long as the host is powerful enough but lately I have been thinking about how to extend it across more than one physical host. I found it obvious that I needed to stretch the VLANs used by VCF between all the physical hosts. I use VLC to deploy VCF and by default it will use VLAN ID 10, 11, 12 and 13. I started with tagging these VLANs on the ports used by my physical hosts. This requires a managed physical switch with support for VLAN trunking. It will also need to support MTU above 1600 bytes to support NSX. I have a QNAP QSW-M408S which supports both.

      Here is a screen shot from the vCenter in my VCF 5.0 instance showing that it could use more resources, at least to be able to run Aria, Tanzu or other resource intensive apps:

      I ran VLCGui and selected Expansion Pack which is the option to use when adding more ESXi hosts to a VCF instance. I configured it to deploy a single ESXi host to the vCenter managing my free physical hosts instead of the one managing my current VCF hosts. After the validation was successful I selected Construct and the nested ESXi host was deployed after a short while.

      I then went into SDDC Manager and commissioned the new host so that it can be used by VCF:

      Next step was adding it to my existing cluster:

      After the host was successfully added to the cluster I wanted to verify that I could ping with jumbo frames from my new nested ESXi host running on an Intel NUC to a nested ESXi host running on my Dell PowerEdge server:

      [root@esxi-5:~] vmkping 172.16.254.14 -S vxlan -s 8800 -d
      PING 172.16.254.14 (172.16.254.14): 8800 data bytes
      8808 bytes from 172.16.254.14: icmp_seq=0 ttl=64 time=1.288 ms
      8808 bytes from 172.16.254.14: icmp_seq=1 ttl=64 time=0.898 ms
      8808 bytes from 172.16.254.14: icmp_seq=2 ttl=64 time=0.996 ms
      
      --- 172.16.254.14 ping statistics ---
      3 packets transmitted, 3 packets received, 0% packet loss
      round-trip min/avg/max = 0.898/1.061/1.288 ms

      This step is not really necessary as SDDC Manager should verify this for you.

      I repeated the steps above to add one more nested ESXi host to my cluster and here is a screen shot from my vCenter with the two additional hosts running:

      I found it easy to extend a VCF cluster deployed with VLC across multiple physical hosts as long as I had a physical switch supporting VLAN trunking and jumbo frames. I hope this can help you to add more resources to your VCF lab.

      Creating VLAN Backed Segments in VMware Cloud Foundation (VCF)

      When deploying VCF the hosts are prepared for NSX using a Transport Node Profile (TNP) where only a single Overlay Transport Zone is attached and no VLAN Transport Zones. This means you are unable to create any VLAN backed segments.

      I have been asked by several customers how to use VLAN backed segments with VCF and I couldn’t find any documentation on this, so I asked VMware if there was a supported way and the answer was yes. We can manually add a VLAN Transport Zone to the existing TNP.

      When using a Baseline based Workload Domain (WLD) the TNP is detached from the cluster. This would always be the case with the Management WLD. This means that when you have added the VLAN Transport Zone to the TNP, it needs to be attached to the cluster so that the Transport Zone can be added to the hosts. Then you should detach the TNP from the cluster again. If you have an Images based WLD, the TNP should already be attached to the cluster and you should leave it like that. The screenshots below are from my Management WLD which is Baseline based. Note that there is nothing listed under Applied Profile.

      I selected the cluster and chose Configure NSX to attach the TNP to the cluster.

      NSX started configuring the ESXi hosts so that the VLAN Transport Zone could be added.

      Checking the configuration on one of the ESXi hosts shows that the VLAN Transport Zone was added successfully.

      I then selected the cluster again and chose Detach Transport Node Profile from the Actions menu so that it is back to the initial state.

      When adding a new host to the cluster, SDDC Manager should attach the TNP to the cluster again, prepare the new host with NSX, then detach the TNP again.