VCF 9 was released this week with a lots of news you can read about here:
https://blogs.vmware.com/cloud-foundation/2025/06/17/whats-new-in-vmware-cloud-foundation-9-0/
Since I work a lot with VCF I wanted to see if my lab was able to run the new version. My newest server has 512 GB RAM, 2 x Intel Xeon Gold 6138 processors and 2 x 2 TB NVMe.
I started with deploying 4 nested ESXi 8 hosts with 24 vCPUs, 128 GB RAM and a 300 GB NVMe disk each. Note that 24 vCPUs are required to run VCF Automation, and while you can get a VCF 9 lab running without it you will miss out on a lot of private cloud functionality. The hosts were then upgraded to ESX 9 by booting on the iso. It complained about my CPU being unsupported but I could choose to force it to upgrade and I have not noticed any issues so far.

To be able to use vSAN ESA on nested hosts I followed this blog post:
https://williamlam.com/2025/02/vsan-esa-hardware-mock-vib-for-physical-esxi-deployment-for-vmware-cloud-foundation-vcf.html
Since I already have a nested VCF 5.2 lab running I decided to reuse some of the components like a virtual router and DNS server to save some time.
I started with deploying the VMware Cloud Foundation Installer on vSphere 8 and point a browser to its FQDN.
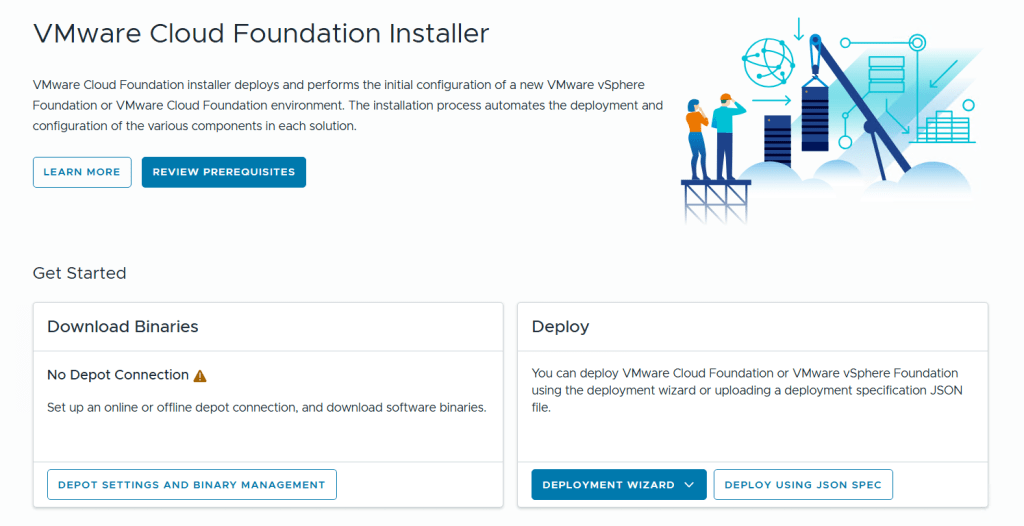
Before we can deploy anything we need to download binaries for all the components either directly from the Internet or from an offline depot. I chose to download directly from the Internet, then selected all the components and clicked on the Download button.

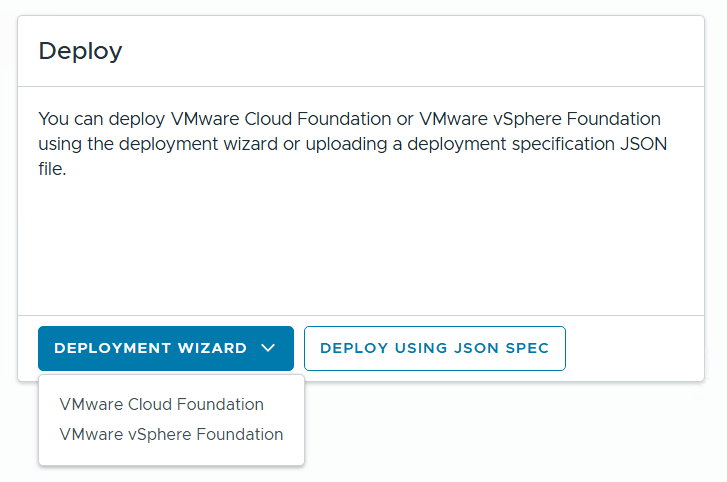
The installer lets you choose between Deploying VMware Cloud Foundation or VMware vSphere Foundation, and you can decide if you want to use a deployment wizard where you are guided through all the input parameters in the user interface or deploy using a json file. I chose to deploy VCF using the wizard this time.
The next step lets you choose between deploying a new VCF Fleet or a new VCF Instance in an existing VCF Fleet. Since I don’t have an existing fleet I chose to deploy a new fleet. The fleet concept is new in VCF 9 and you can read more about it here:
https://blogs.vmware.com/cloud-foundation/2025/06/17/modern-infrastructure-operations-vcf-9-0/
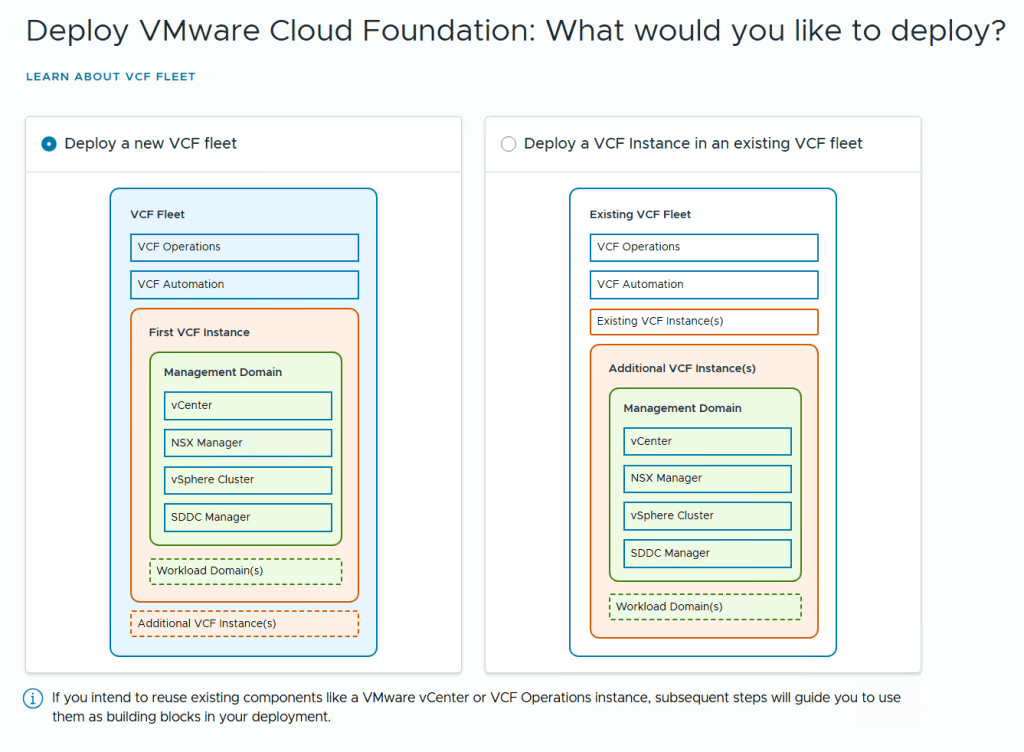
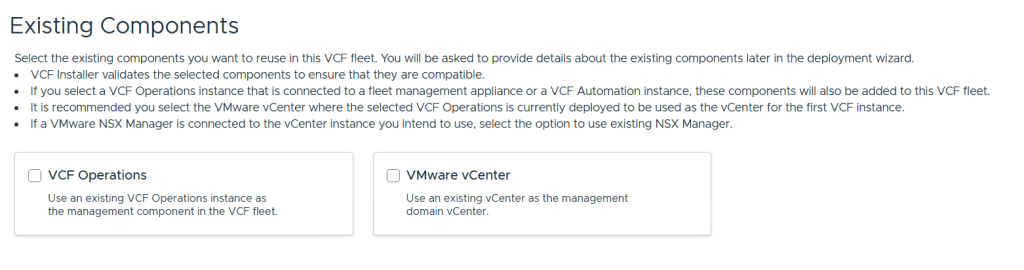
We are then able to point to existing VCF Operations and vCenter instances to use in this fleet. I didn’t select any of them since I wanted to deploy brand new ones.
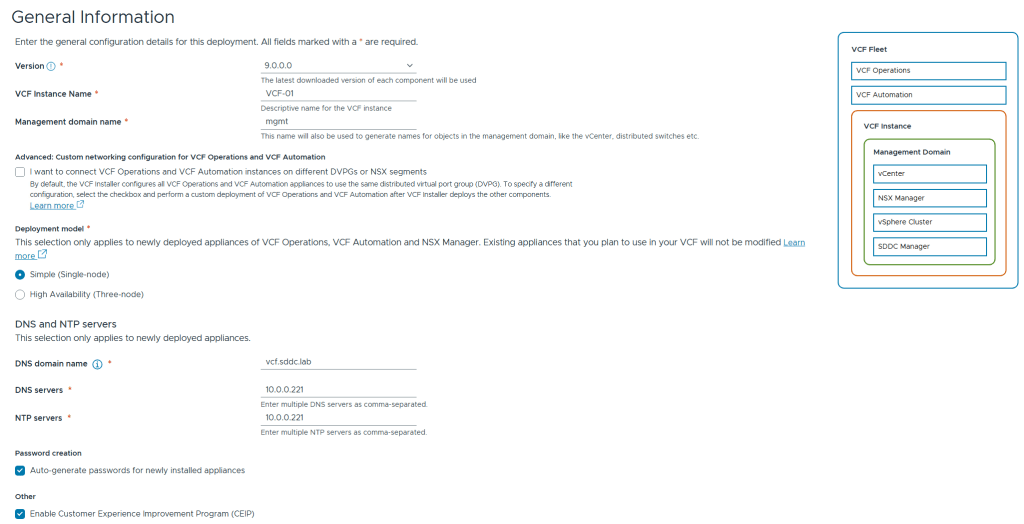
We are then presented with the following screen asking for general information. To save on resources I chose the Simple deployment model which deploys a single node of each appliance instead of three nodes for high availability. I also chose to have all the passwords auto-generated. These are presented in the user interface at the end of the deployment including user names and FQDNs for each product in VCF 9.
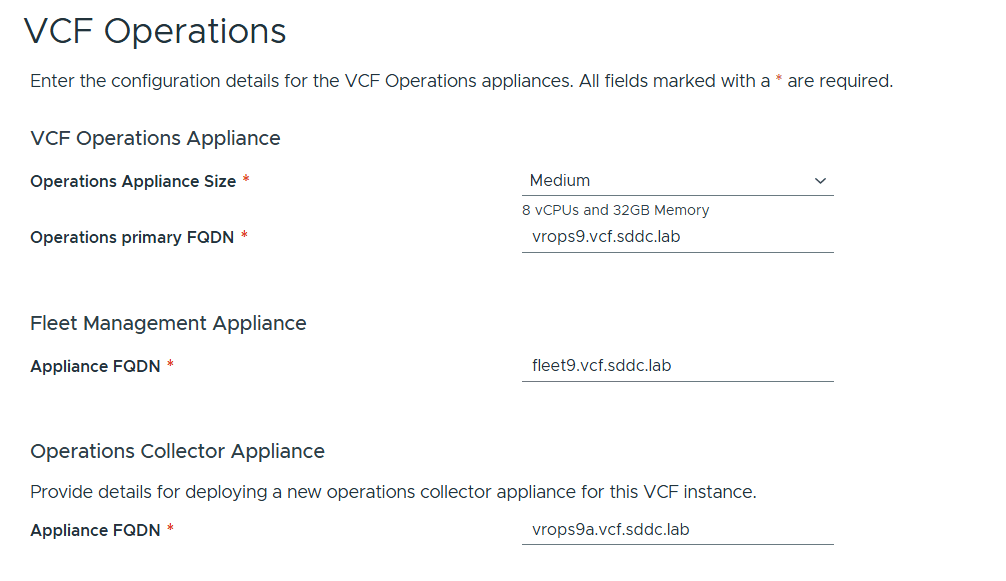
VCP Operations is mandatory in VCF 9, and so is also the Fleet Management Appliance which is based on Aria Suite Lifecycle but with more features. You also have to deploy an Operations Collector Appliance. Note that you don’t have to provide any IP addresses as they are populated by looking up from DNS so make sure those are present and correct, both forward and reverse records.
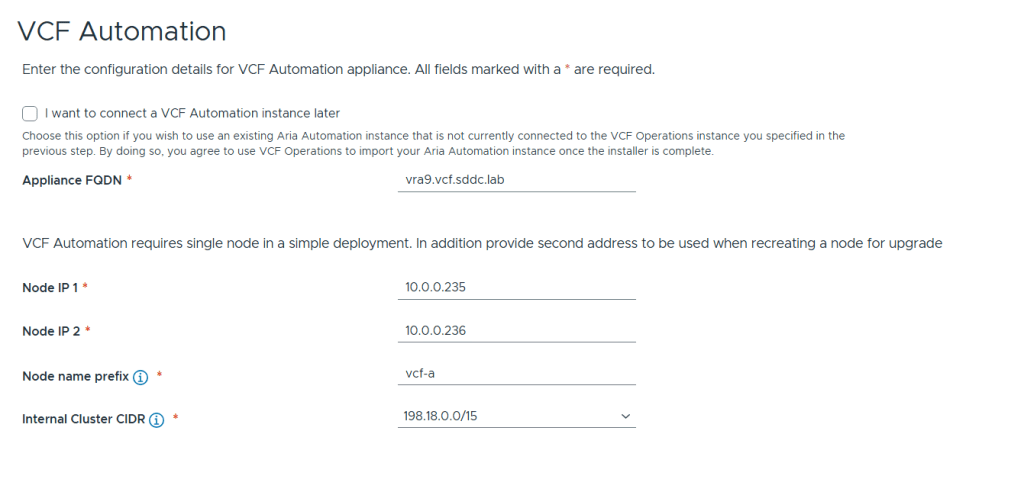
Next up is VCF Automation configuration which has the option to be skipped and connected later. I chose to deploy it now since I wanted a proper private cloud as fast as possible 🙂
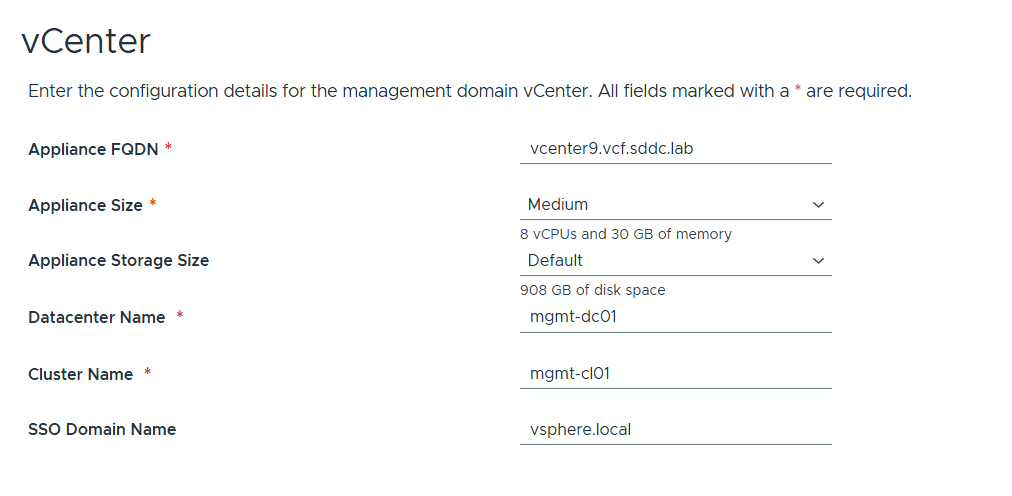
vCenter configuration is straight forward and nothing new here. I chose Medium size since I have bad experience with anything smaller than that and would like to avoid having to scale up later.
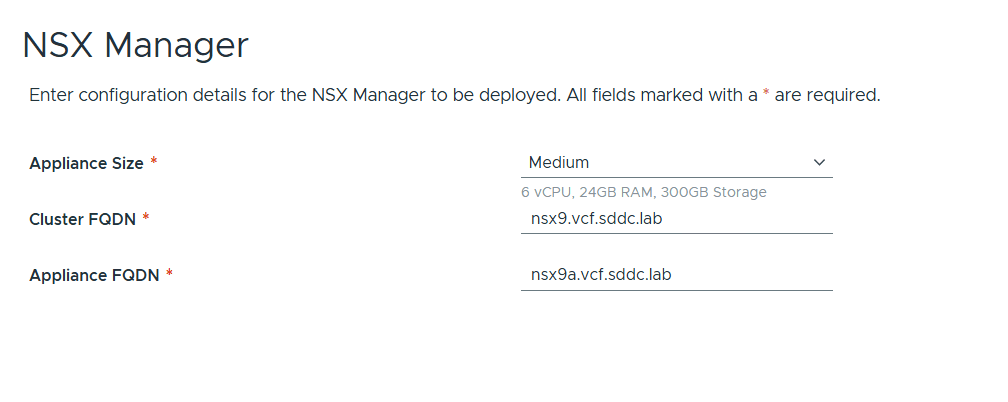
NSX Manager configuration is also very simple. Note that only a single node is supported but not recommended for a productions environment due to lack of redundancy. I also chose Medium size here to avoid performance issues down the road. NSX Manager is mandatory but NSX Edges are not and also not part of this initial deployment.
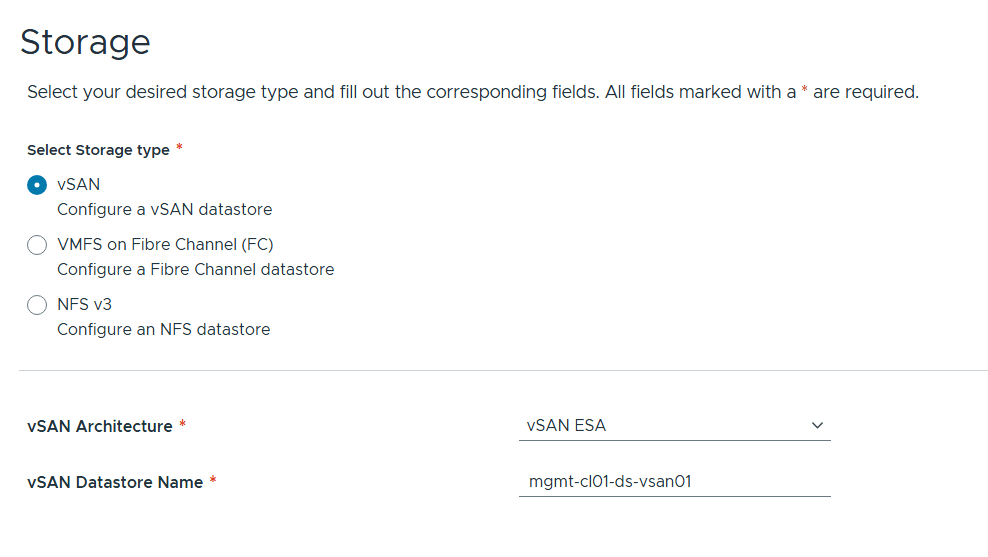
You have three options for Storage as pictured above. I chose vSAN ESA as that is the new improved standard for vSAN that I want to get more experience with.
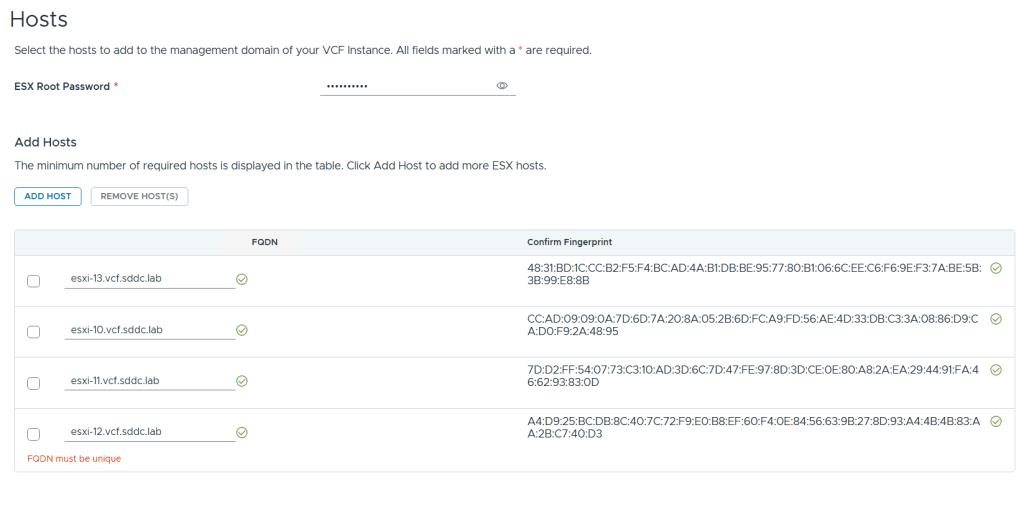
Adding ESX hosts is straight forward. Simply provide the root password, FQDNs and confirm the fingerprints (if they match your hosts :-).
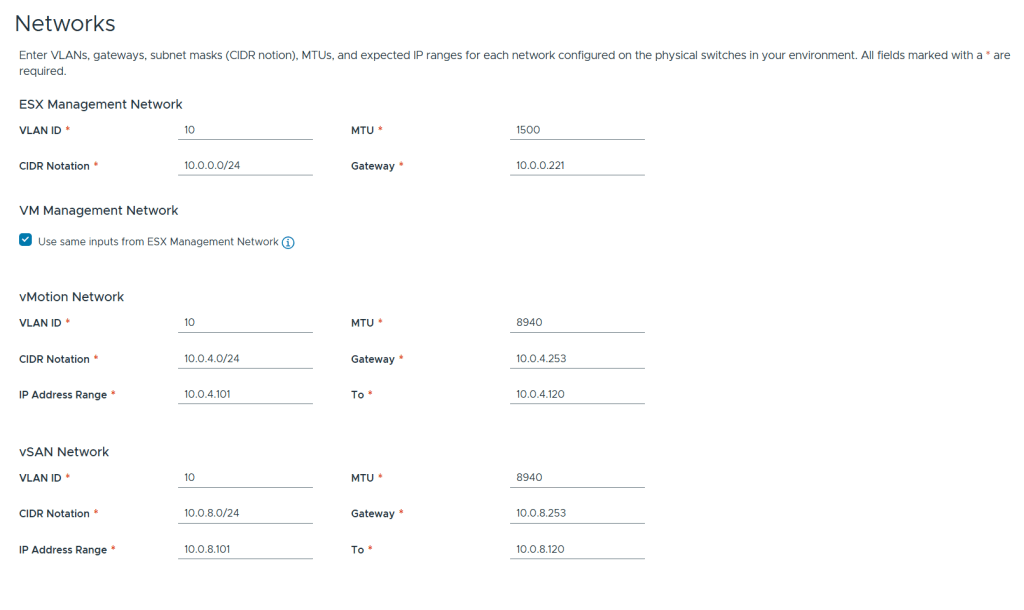
There is nothing new regarding networks configuration. I chose to use the same VLAN ID for all the networks for simplicity in my lab but in a production deployment these should be unique. I use 8940 MTU for vMotion and vSAN since this is a nested lab. The VDS use the standard 9000 MTU.
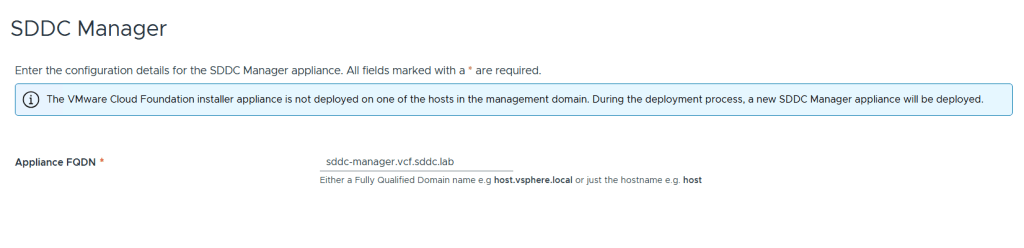
All that is needed for SDDC Manager is the FQDN. Note that it is possible to turn the VCF Installer appliance into the SDDC Manager appliance during the deployment. I wanted them to be two separate appliances since I will probably use the VCF Installer many times.
We are then presented with a Review screen where we get a summary of the configuration, the option to see a json preview and also the option to download the json spec as a file. This file can be edited and imported into the VCF Installer again for another deployment. Another nice detail about the VCF Installer is that you can close it at any time during the configuration process and it will let you save the progress so that you can continue at a later time.

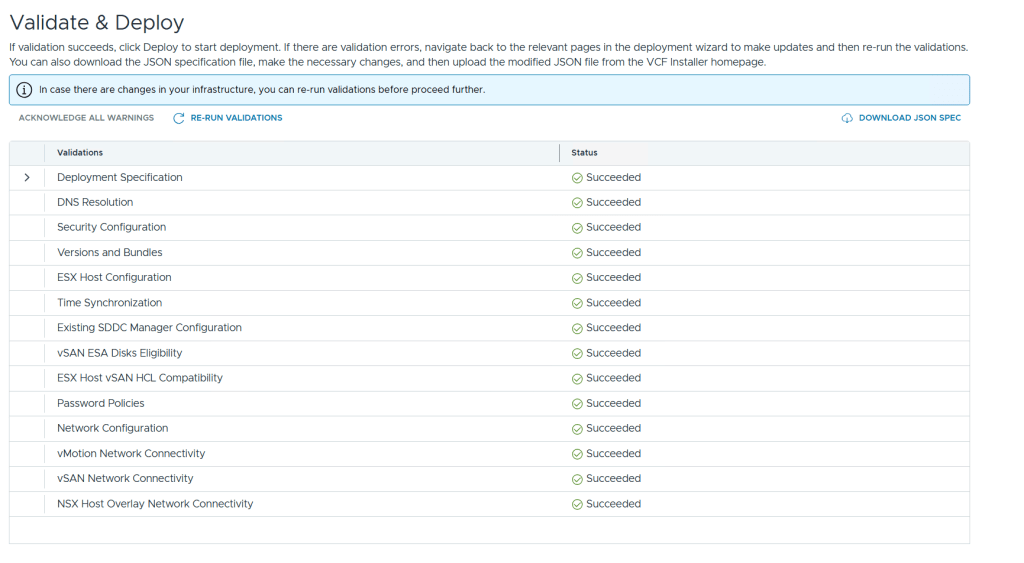
Before you can start the deployment you must run a validation. If the validation detects any errors you will have to resolve those before it allows you to deploy, but any warnings can be acknowledged so that you may still start the deployment. Lucky for me I didn’t get any warnings or errors.
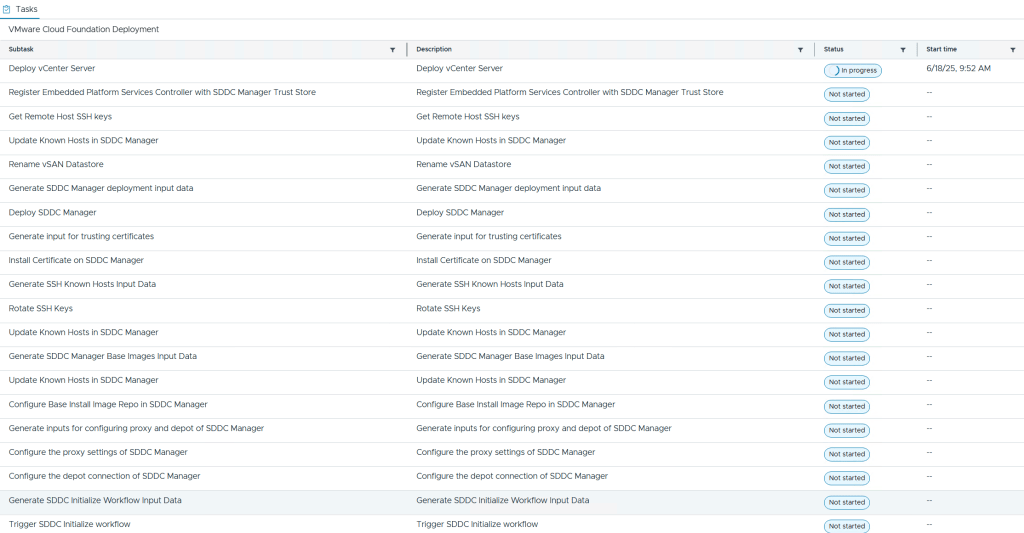
During the deployment you are able to see each subtask with their status. I also recommend that you follow the domainmanager.log file on the VCF Installer appliance so you can spot and fix problems before they cause the VCF Installer to time out with an error message. My deployment failed once after it deployed VCF Automation due to running out of disk space. After freeing up disk space I could choose to retry the deployment and it started again at the point where it failed and didn’t need to start from the beginning. Note that it was my local datastore hosting the nested ESX hosts that ran out of disk space so 300 GB was enough for each nested ESX host. The vSAN ESA datastore consumed less than 50% after the deployment.
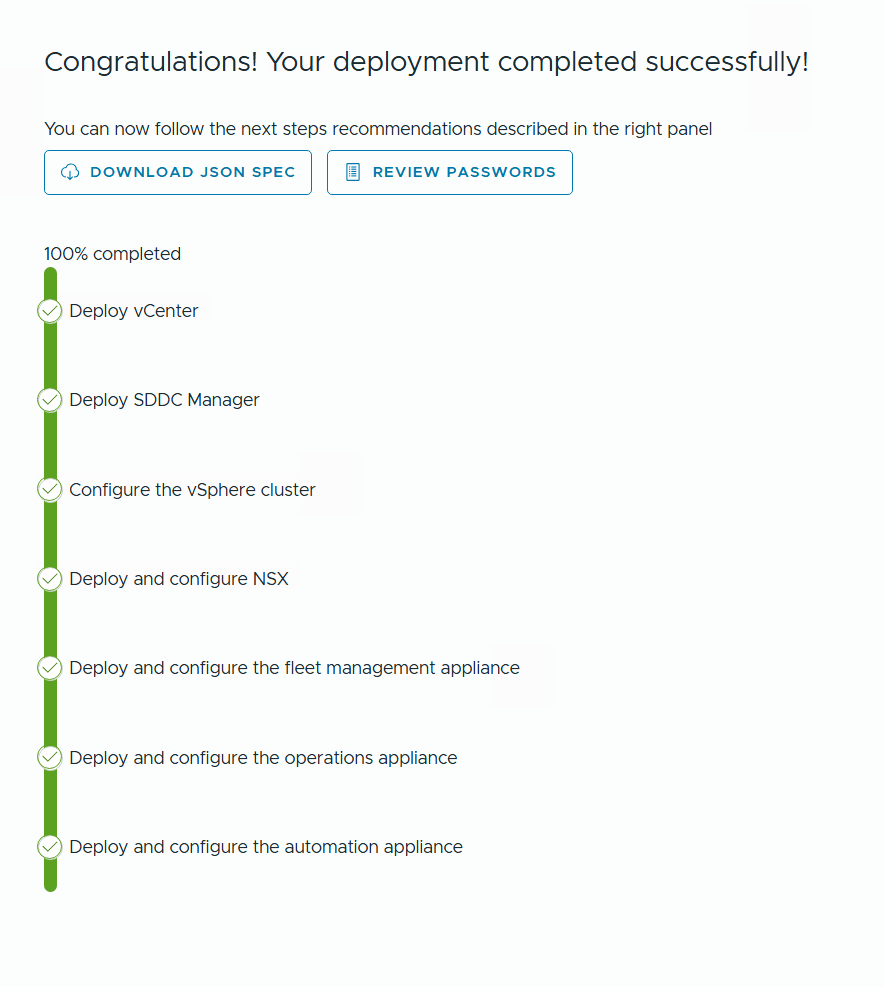
After a few hours I was presented with this happy message and by clicking on Review Passwords I could see how to log into my brand new VCF 9 lab.