I have a Dell PowerEdge T440 which doesn’t support booting ESXi directly from my PCIe NVMe drive. This server does not have any other controllers or drives, so my only option is to boot it from USB/SD. Since booting ESXi from USB/SD is deprecated I found another solution. Clover is a bootloader with many features including booting an OS from an NVMe drive on systems not supporting booting from NVMe. Clover itself boots from USB and then starts ESXi from the NVMe drive. Note that this is not the same as installing ESXi on a USB drive and booting it directly. Using Clover makes ESXi unaware that the server is booting from USB and no constraints will be put in place compared to booting directly from the NVMe drive.
Here is how to do it:
- Install ESXi on your NVMe device.
- Format a USB drive with FAT32.
- Download CloverV2-5154.zip from here and extract it to your USB drive: https://github.com/CloverHackyColor/CloverBootloader/releases
- Copy /EFI/CLOVER/drivers/off/UEFI/Other/NvmExpressDxe.efi to /EFI/CLOVER/drivers/UEFI/NvmExpressDxe.efi on the USB drive.
- Boot your server from the USB drive and press F3 in Clover to display any hidden devices. Try to boot the devices to figure out which one is your NVMe device containing ESXi. If you get problems, pressing F2 will write the log file to the \EFI\CLOVER\misc folder.
To make Clover boot from your NVMe device automatically without having to press F3 and manually selecting your device, follow these steps:
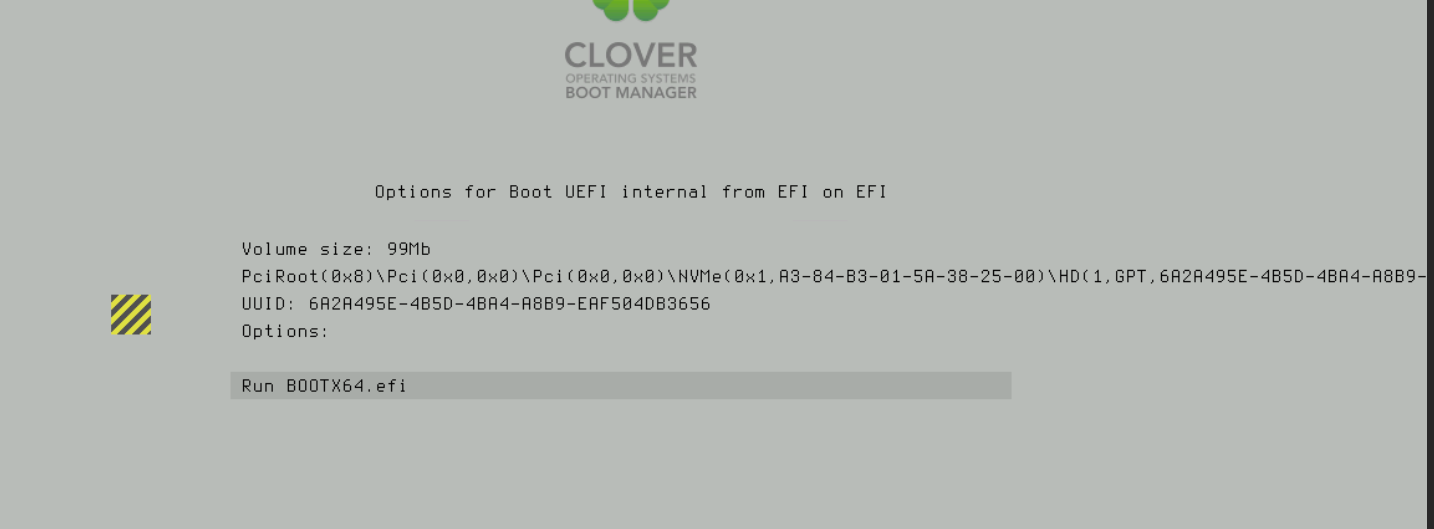
- Boot your server from the USB drive one more time. Press F3 in Clover, select your device and press the space bar to show details about your device. Record the UUID.
- Create the following xml file on your USB drive: D:\EFI\CLOVER\config.plist and populate it according to the following doc: https://sourceforge.net/p/cloverefiboot/wiki/Configuration/
Here is a copy of my config file which makes Clover boot ESXi automatically from my NVMe:
<?xml version="1.0" encoding="UTF-8"?>
<!DOCTYPE plist PUBLIC "-//Apple//DTD PLIST 1.0//EN" "http://www.apple.com/DTDs/PropertyList-1.0.dtd">
<plist version="1.0">
<dict>
  <key>Boot</key>
  <dict>
    <key>Timeout</key>
    <integer>0</integer>
    <key>DefaultLoader</key>
    <string>\EFI\BOOT\BOOTX64.efi</string>
	<key>DefaultVolume</key>
    <string>6A2A495E-4B5D-4BA4-A8B9-EAF504DB3656</string>
  </dict>
  <key>GUI</key>
  <dict>
    <key>Custom</key>
    <dict>
      <key>Entries</key>
      <array>
        <dict>
          <key>Path</key>
          <string>\EFI\BOOT\BOOTX64.efi</string>
          <key>Title</key>
          <string>ESXi</string>
          <key>Type</key>
          <string>Linux</string>
          <key>Volume</key>
          <string>6A2A495E-4B5D-4BA4-A8B9-EAF504DB3656</string>
          <key>VolumeType</key>
          <string>Internal</string>
        </dict>
      </array>
    </dict>
  </dict>
</dict>
</plist>
You must replace the Volume string with your own UUID that you recorded previously.
